Healthy Steamed Snacks with the Ultra Diet Steamer : Your Ultimate Guide

steamed snack with steamer recipe

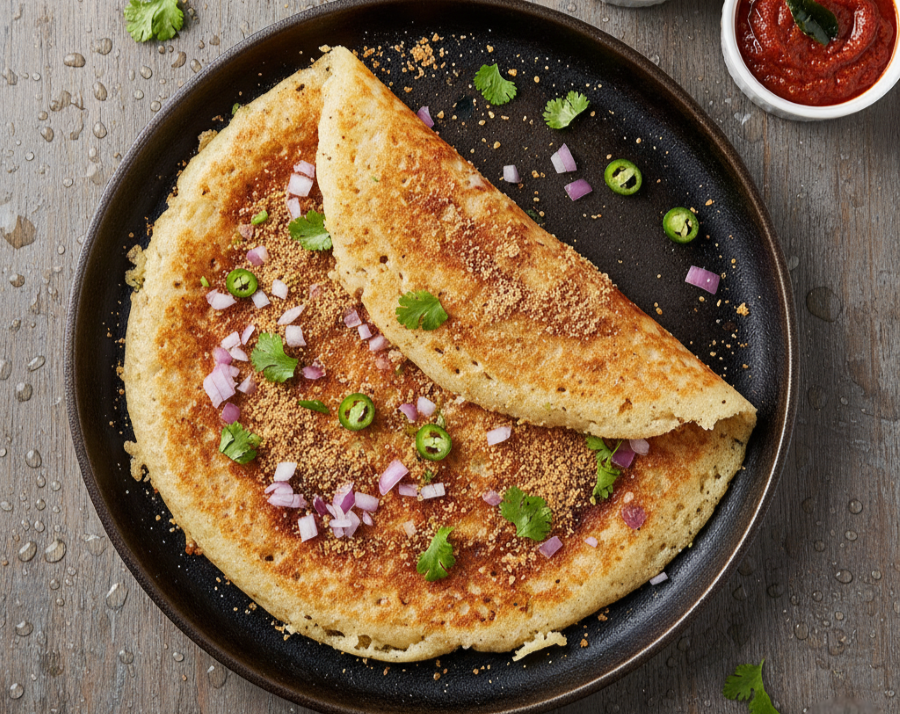
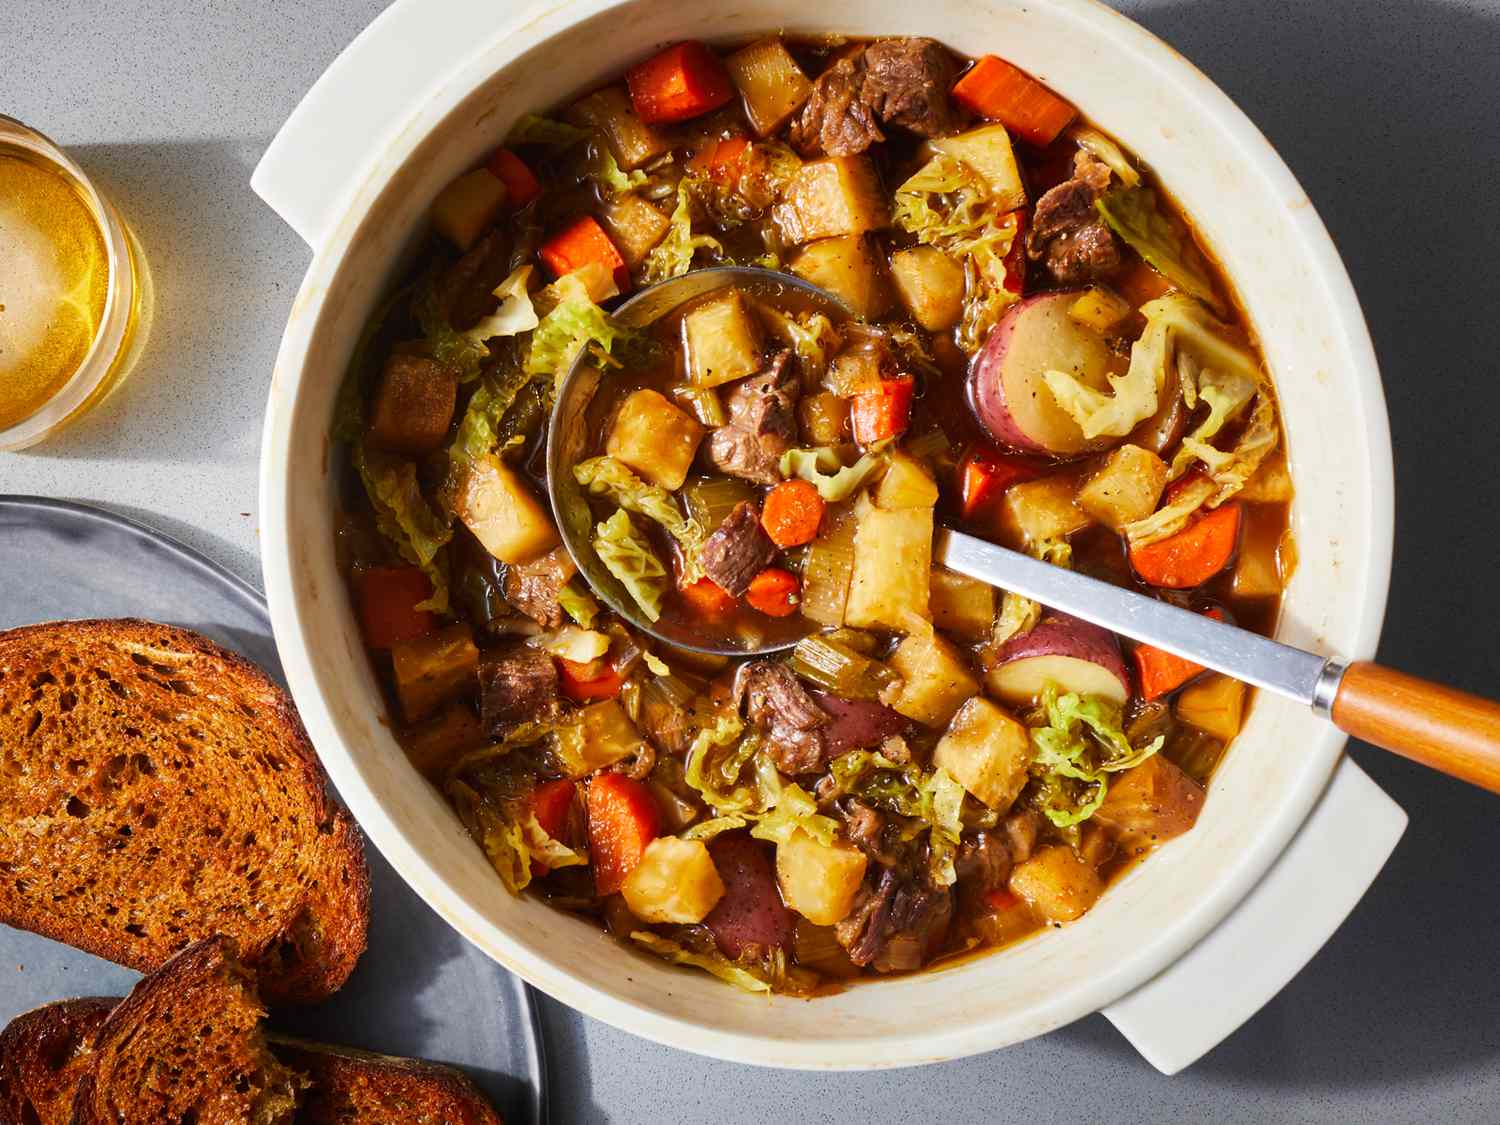
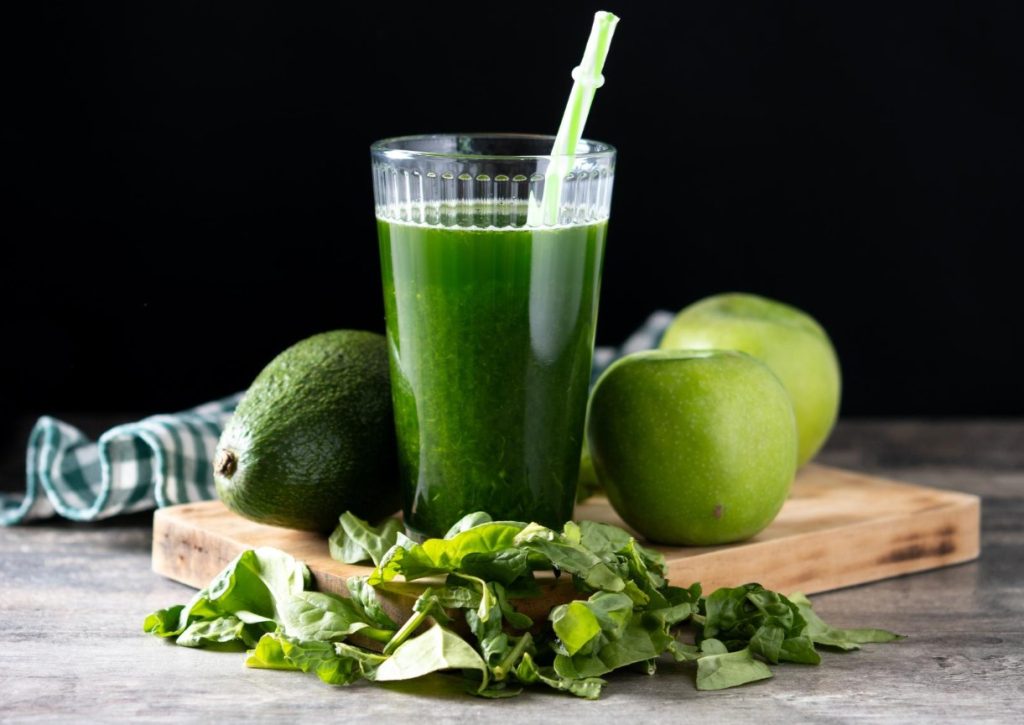
Snacking is a way of life in India, from mid-morning munchies to chai-time cravings. But deep-fried indulgences often bring along guilt, greasy fingers, and unwanted calories. It’s time to switch to something lighter, tastier, and smarter: steamed snacks.

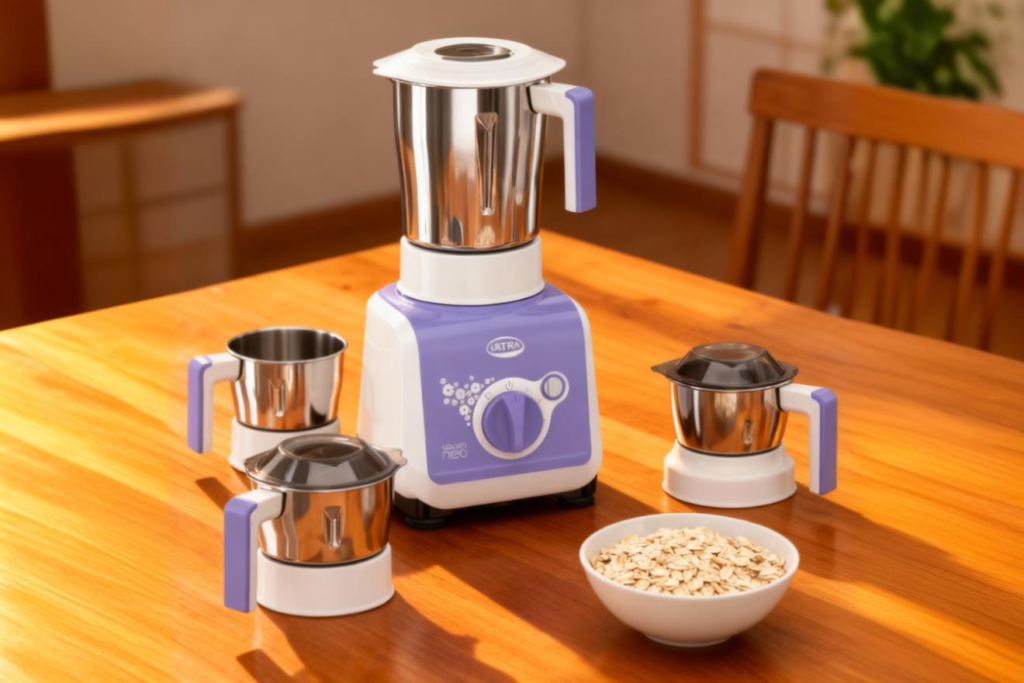
With the Ultra Diet Steamer by Elgi Ultra, you can prepare a wide variety of wholesome snacks that are low in oil yet rich in nutrients and authentic Indian flavours. Steaming helps you retain nutrients, preserve textures, and bring out the natural taste of ingredients.

Why Choose Steamed Snacks?

  • Zero oil cooking: Light, clean, and easy to digest
  • Nutrient retention: Steaming keeps vitamins and minerals intact
  • Natural flavours preserved: Ingredients taste fresh and vibrant
  • Gentle on the stomach: Ideal for kids, elders, and health-conscious eaters
  • Perfect for any time of day: Breakfast, snacks, or even light dinners

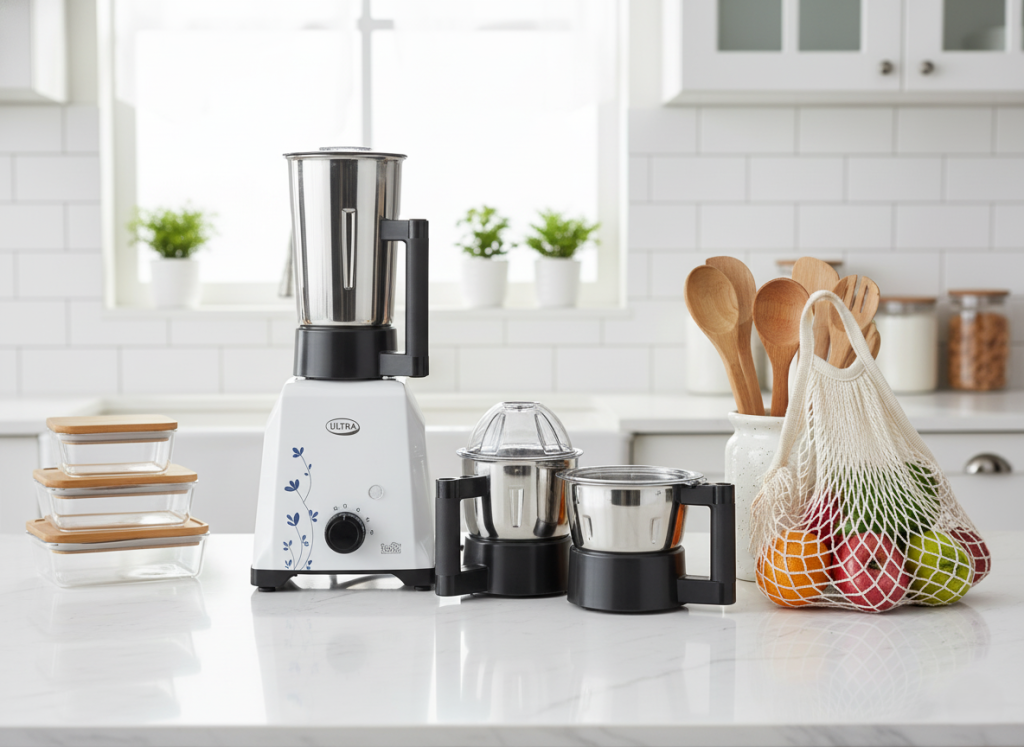
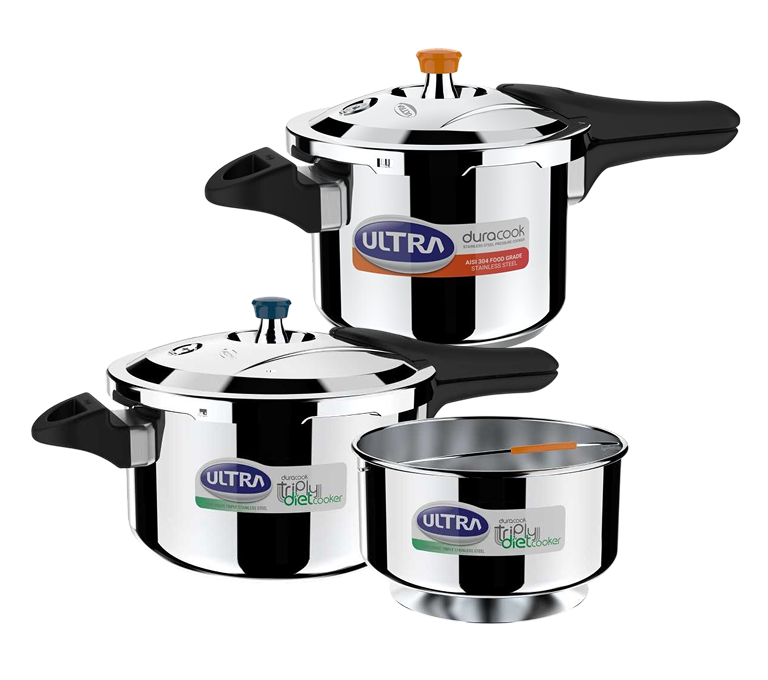
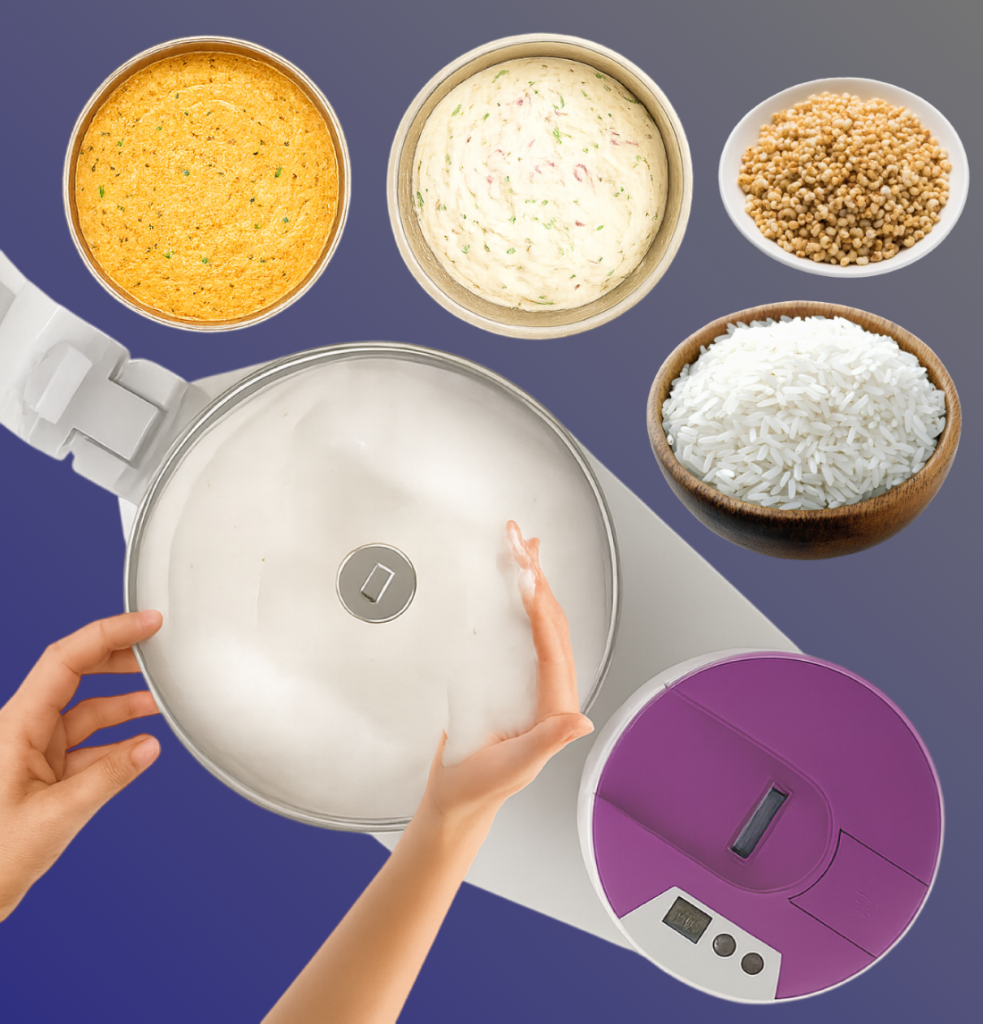
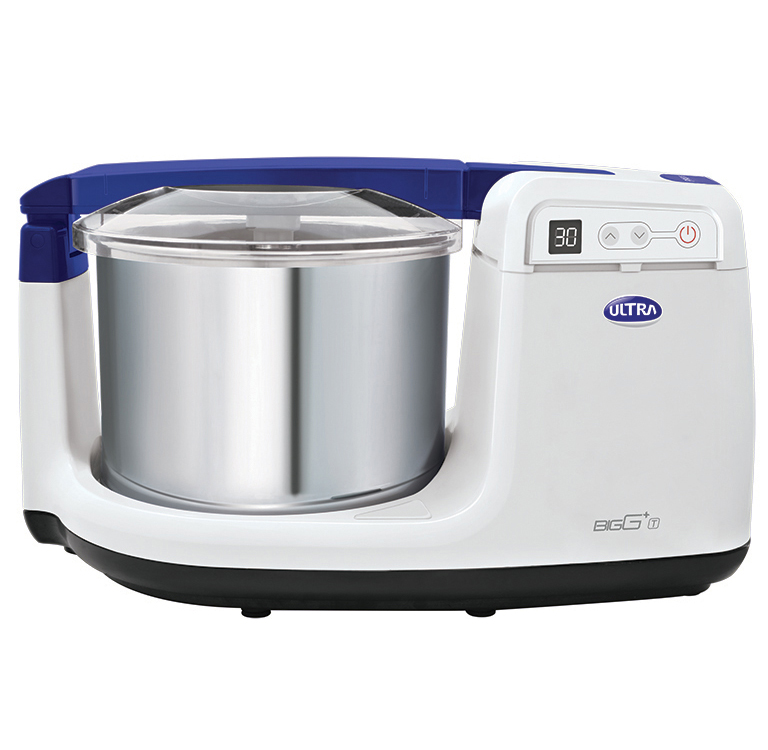
About the Ultra Diet Steamer

The Ultra Diet Steamer redefines convenience in healthy cooking.
Diet Infinity
Key Features:

  • Made of AISI 304 food-grade stainless steel for safe, odour-free cooking
  • Large capacity with multiple trays for cooking idlis, momos, and modaks together
  • Compatible with both induction and gas stovetops
  • Compact design that fits smaller kitchens

Tip: If you’re serious about batch-cooking healthy snacks, this steamer is your kitchen MVP.

Explore more from the Ultra Diet Infinity Collection.

Steaming Reference Table

Snack Steam Time
Veggie Idlis10–12 minutes
Ragi Dhokla15–20 minutes
Lauki Muthiyas20–25 minutes
Veg Momos10–12 minutes
Corn & Spinach Panki10–15 minutes
Rice Flour Modaks10–15 minutes
Steamed Besan Squares20–25 minutes
Paneer & Oats Dumplings10–12 minutes
Millet Puttu10–15 minutes
Beetroot Idiyappam8–10 minutes

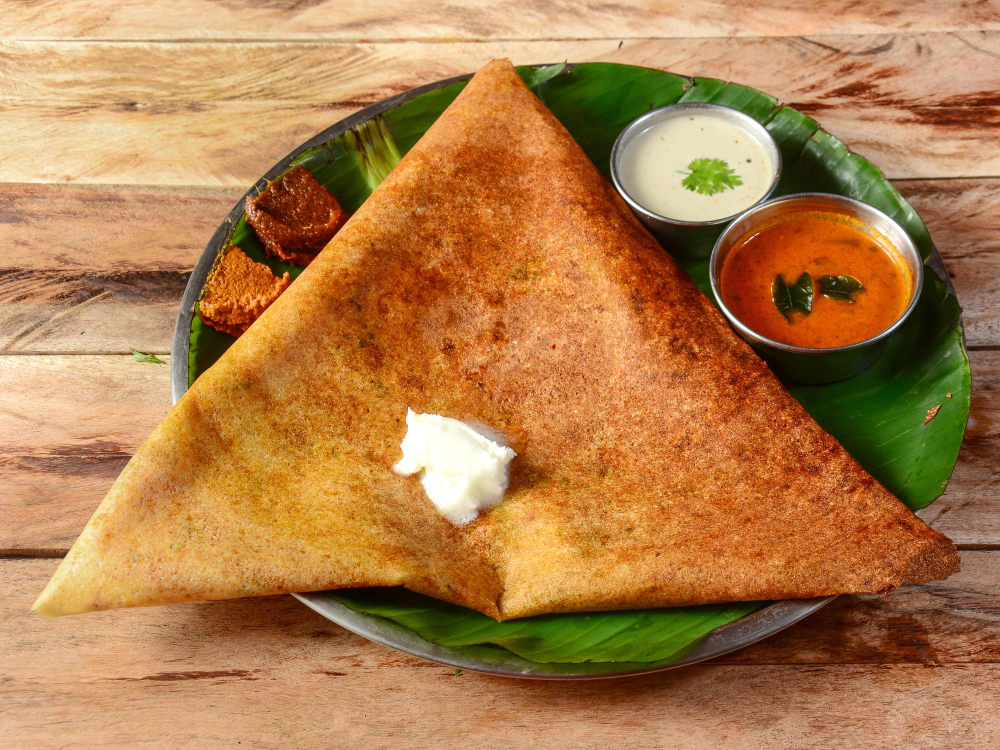
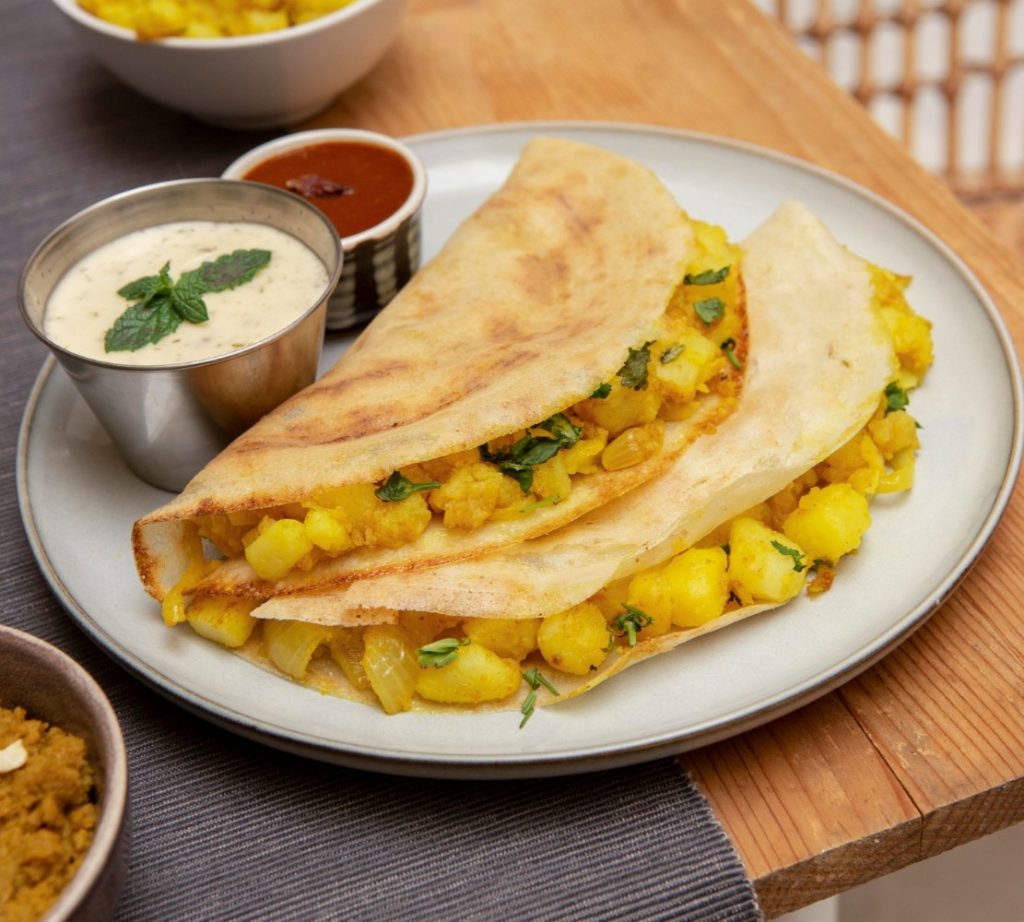
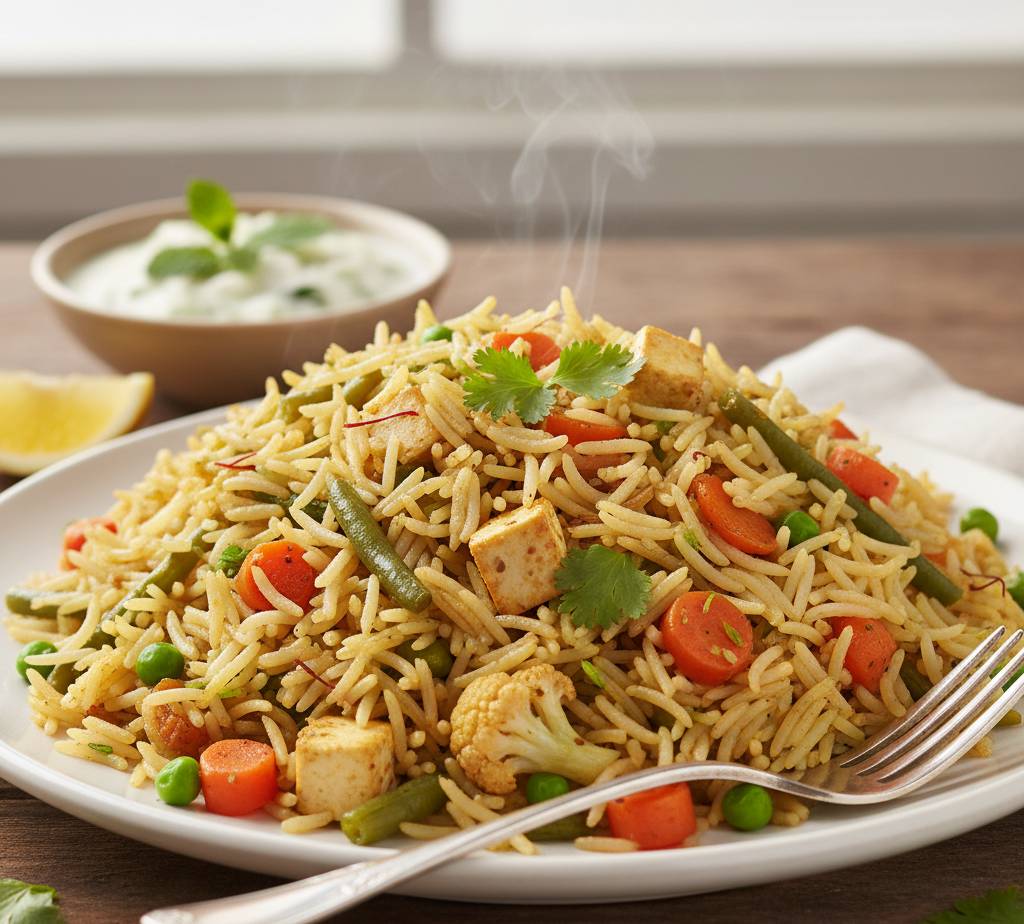
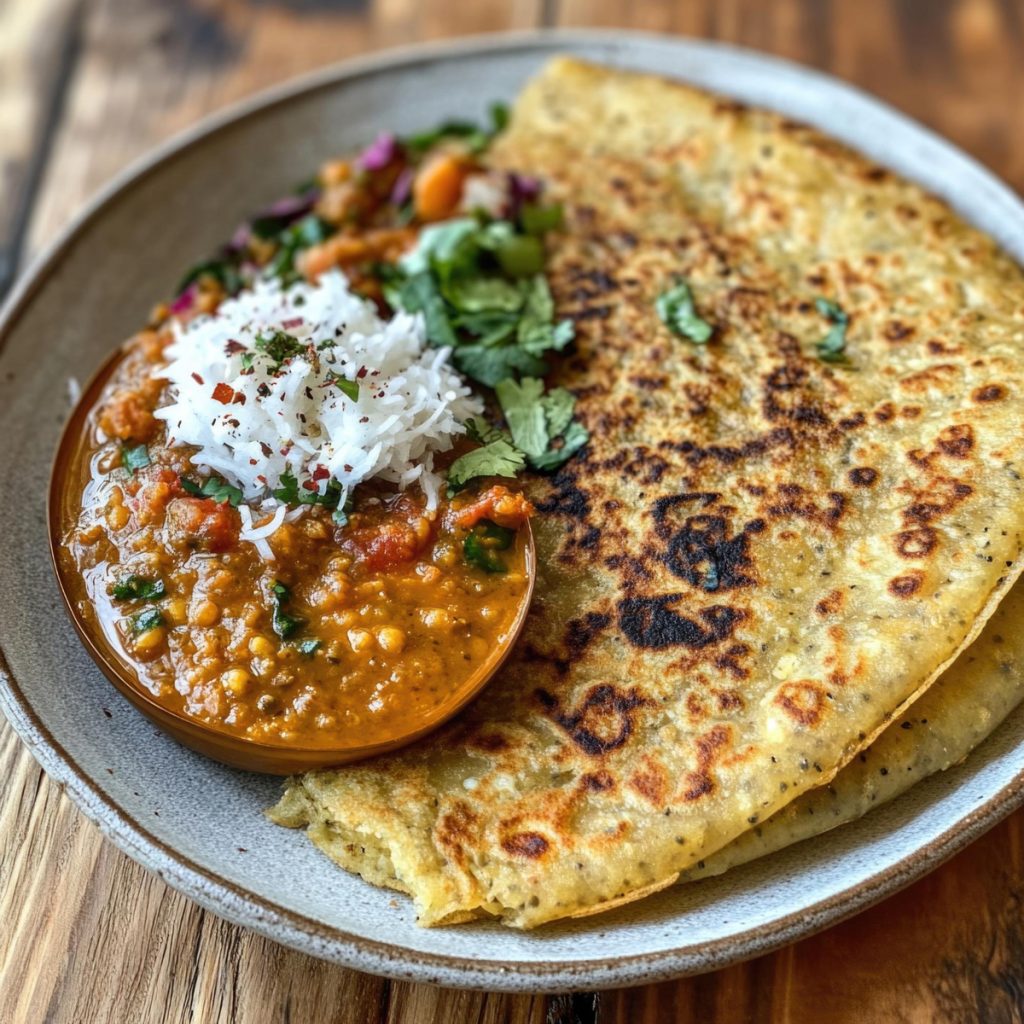
10 Delicious Steamed Snacks to Try
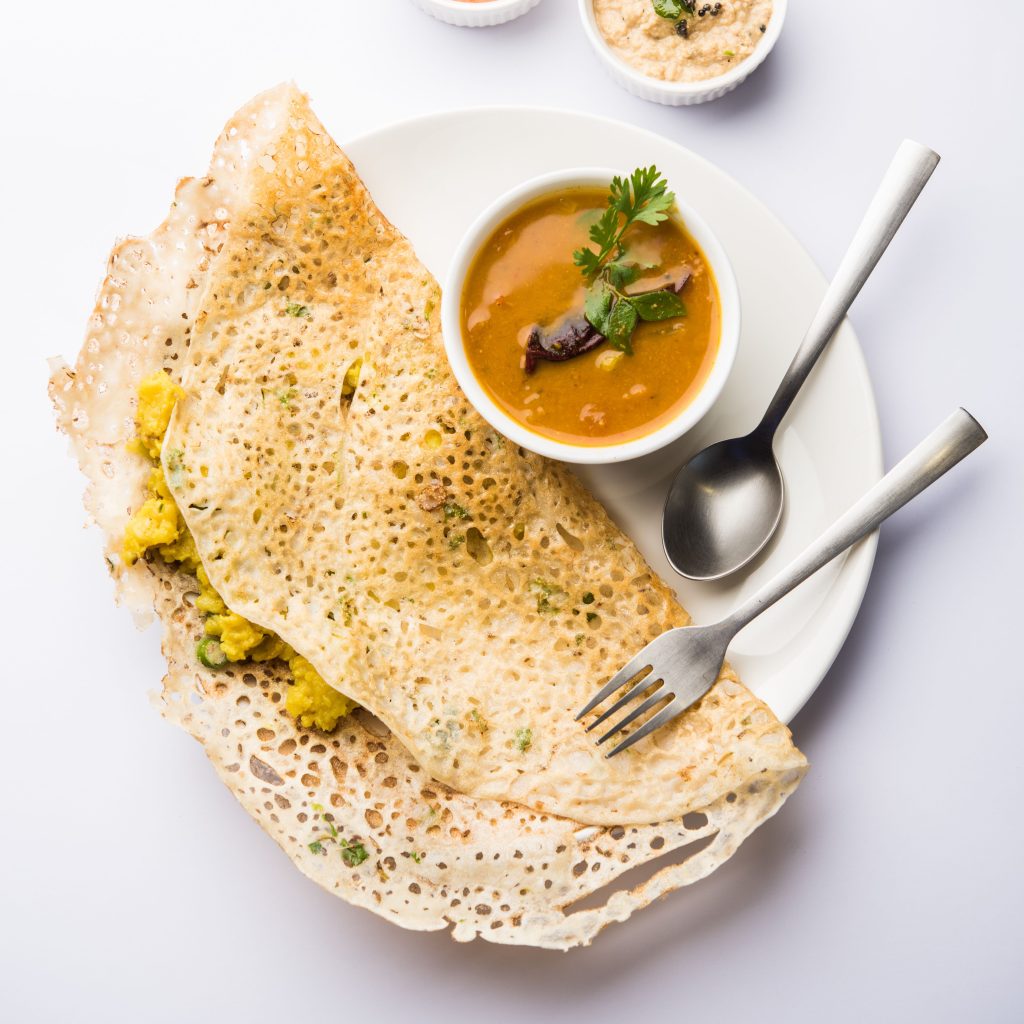
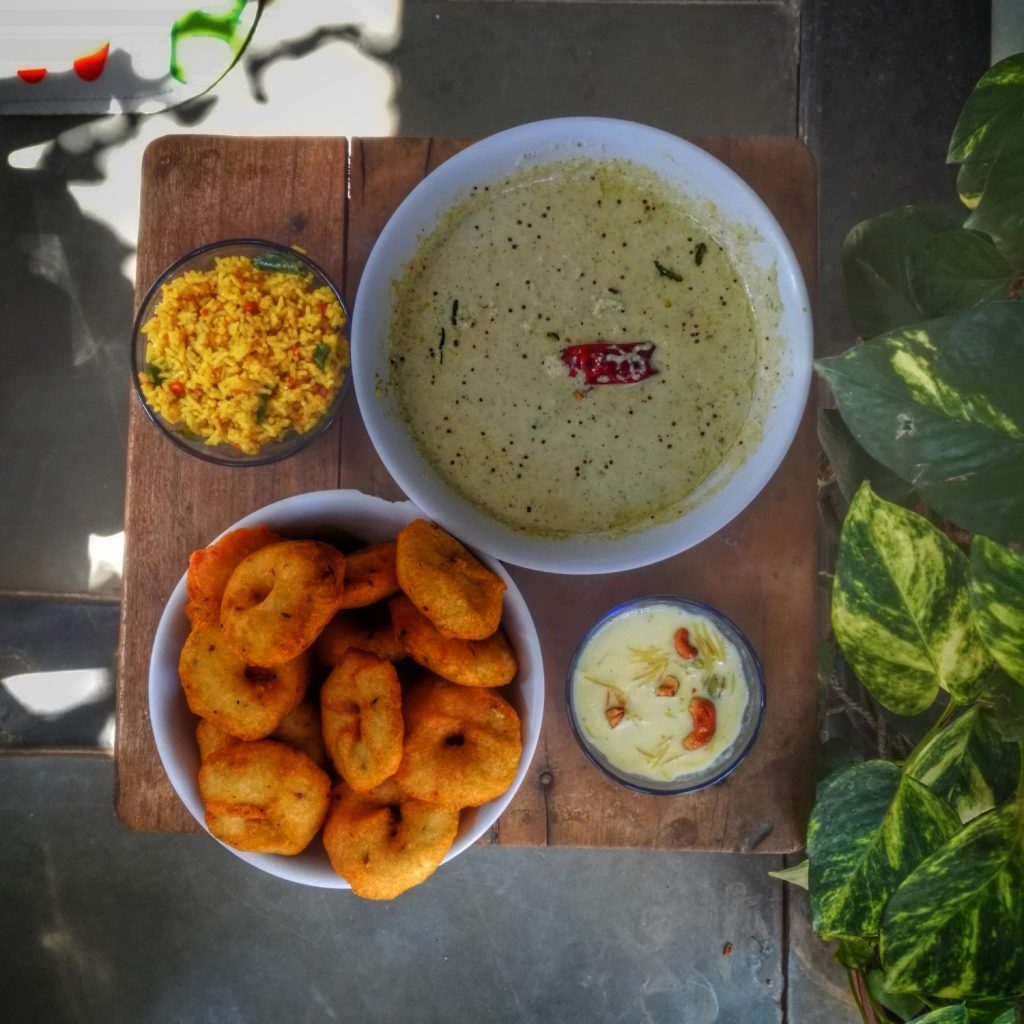
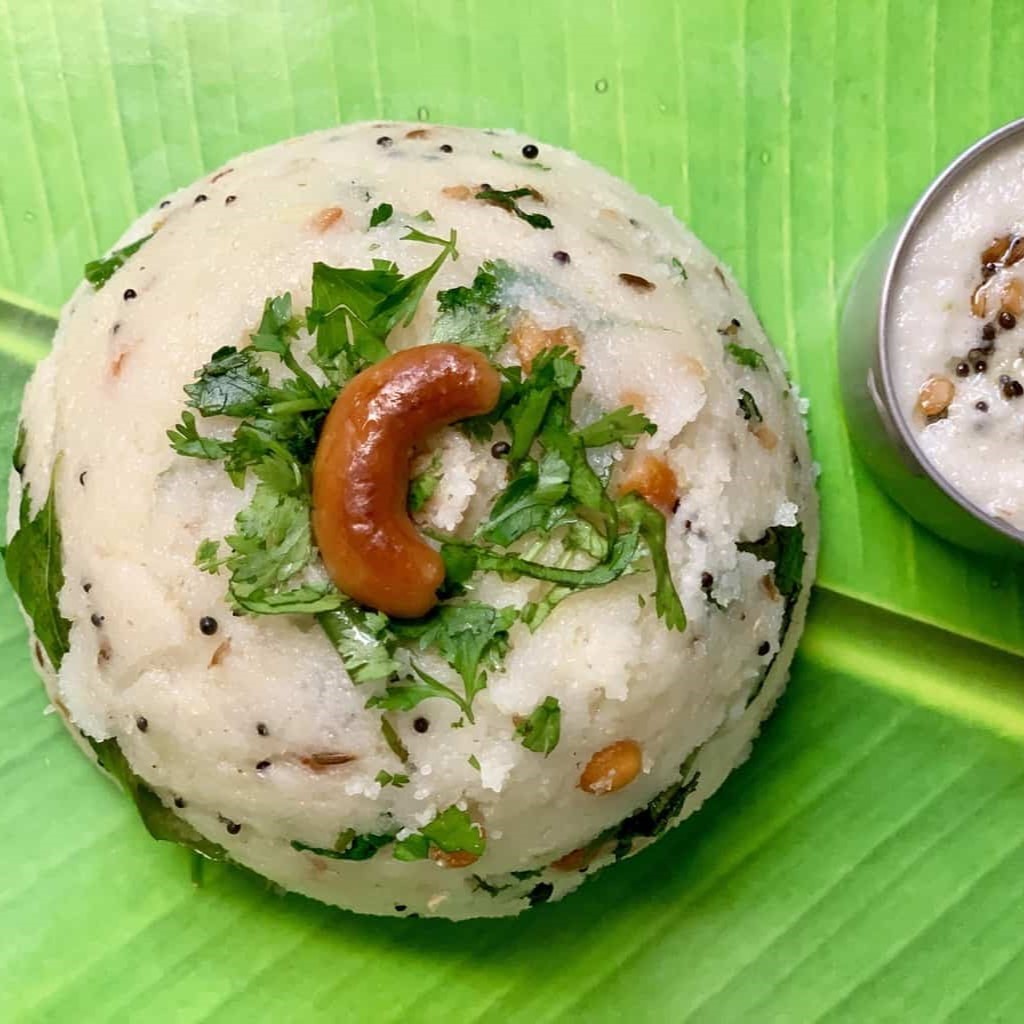
1 . Veggie Idlis

A healthy twist on the classic South Indian favourite.
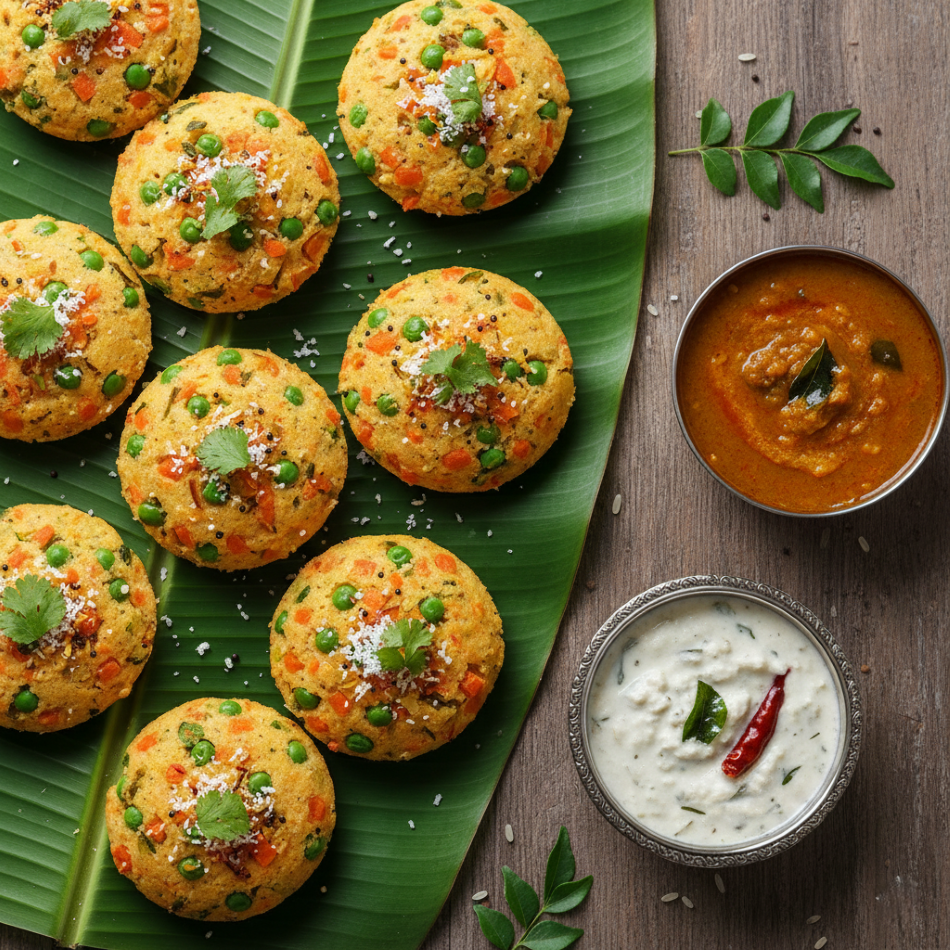
veggie idli

Ingredients:

  • 2 cups idli/dosa batter
  • ½ cup grated carrot
  • ½ cup chopped spinach
  • ¼ cup green peas
  • Salt to taste
  • 1 tsp oil or ghee (for greasing)

Method:

  1. Mix all vegetables into the idli batter.
  2. Lightly grease idli moulds.
  3. Pour the batter, stack trays in the Ultra Diet Steamer, and steam for 10–12 minutes.
  4. Serve hot with sambar and coconut chutney.
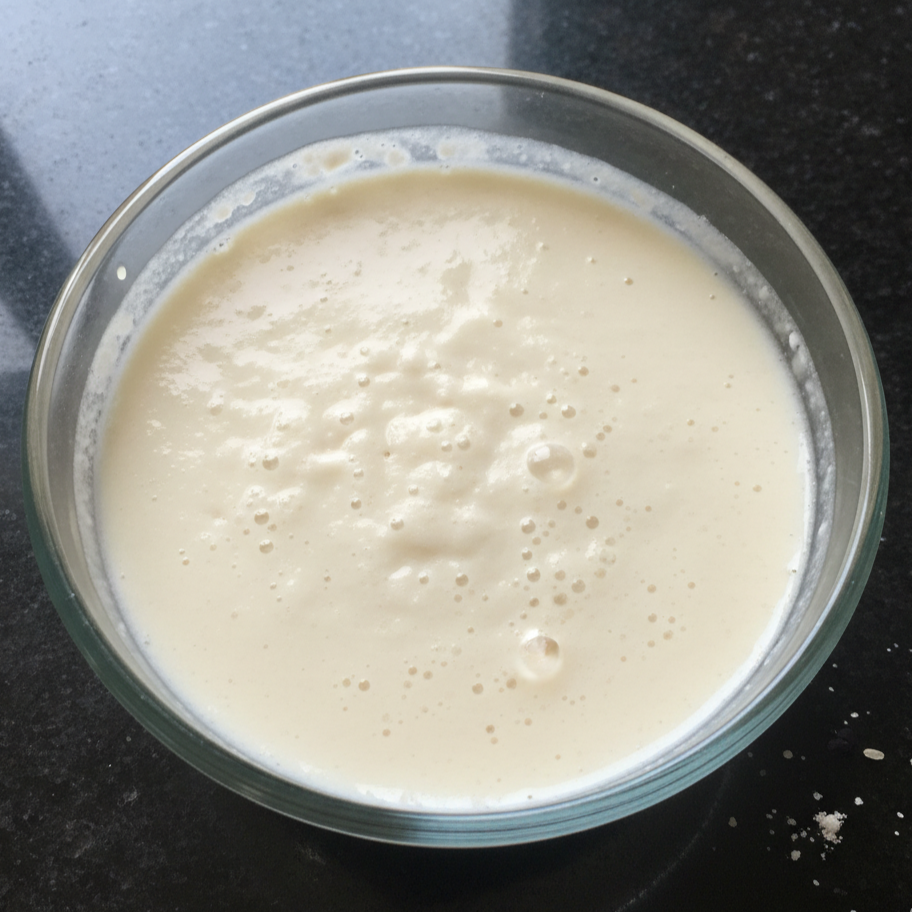
2 . Ragi Dhokla

A soft, earthy and protein-rich Gujarati favourite.
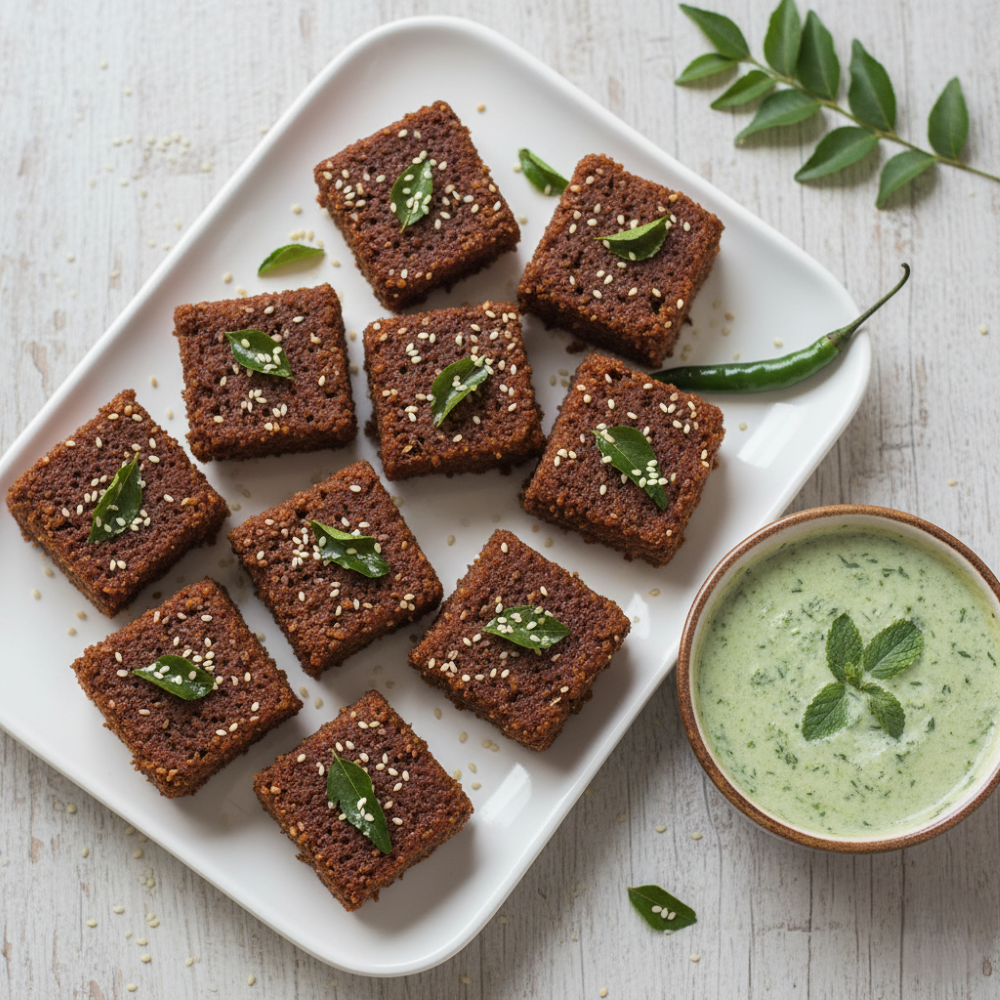
Ingredients:

  • 1 cup ragi flour
  • ½ cup sour yoghurt
  • ½ cup water
  • 1 tsp ginger-chili paste
  • ¼ tsp turmeric powder
  • 1 tsp fruit salt (Eno)
  • Salt to taste

For tempering:

  • 1 tsp oil
  • 1 tsp mustard seeds
  • 1 tsp sesame seeds
  • Curry leaves, green chili, pinch of hing

Method:

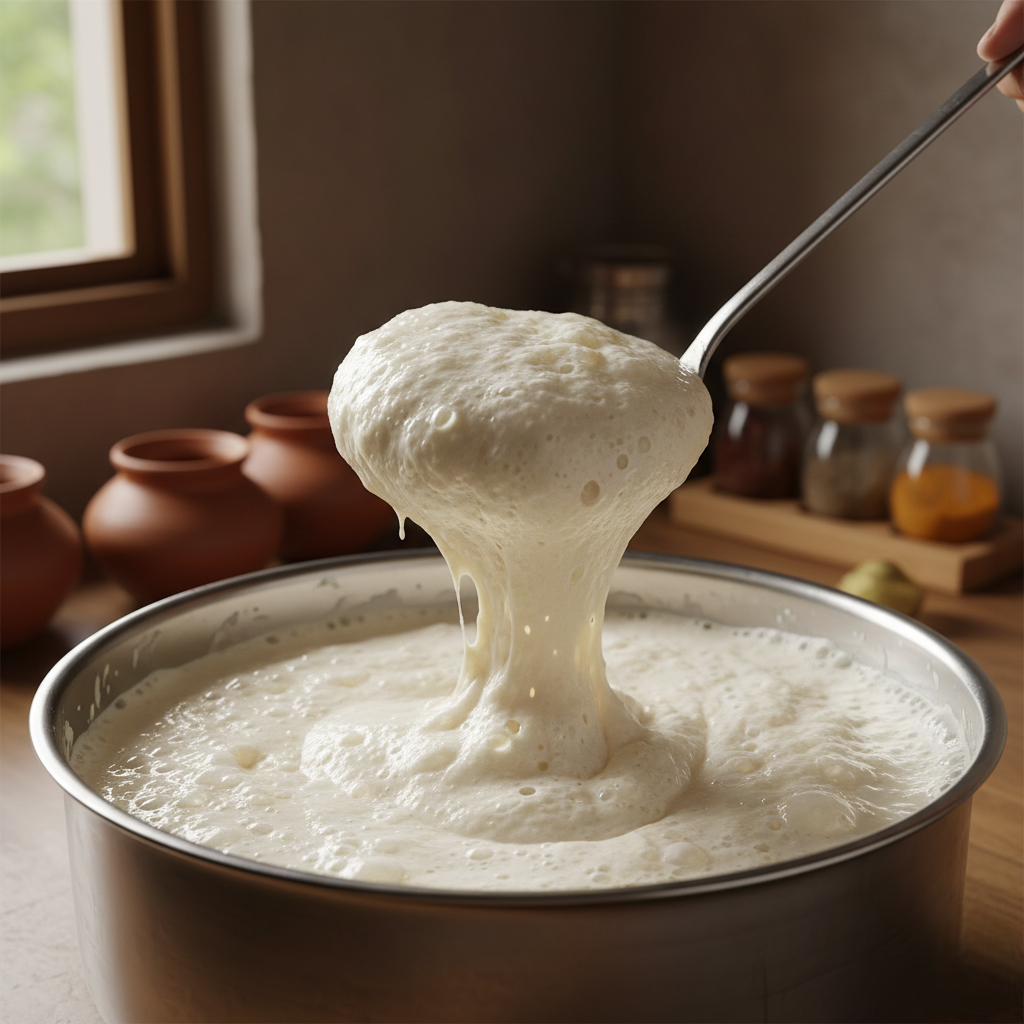
  1. Mix flour, yoghurt, and water to make a thick batter. Rest for 15 minutes.
  2. Add ginger-chili paste, turmeric, and salt.
  3. Add fruit salt just before steaming and mix gently.
  4. Pour into greased tray, steam for 15–20 minutes.
  5. Temper with mustard, sesame, and curry leaves, pour on top, and cut into squares.

3 . Stuffed Lauki Muthiyas

Soft and spicy bites packed with fibre.
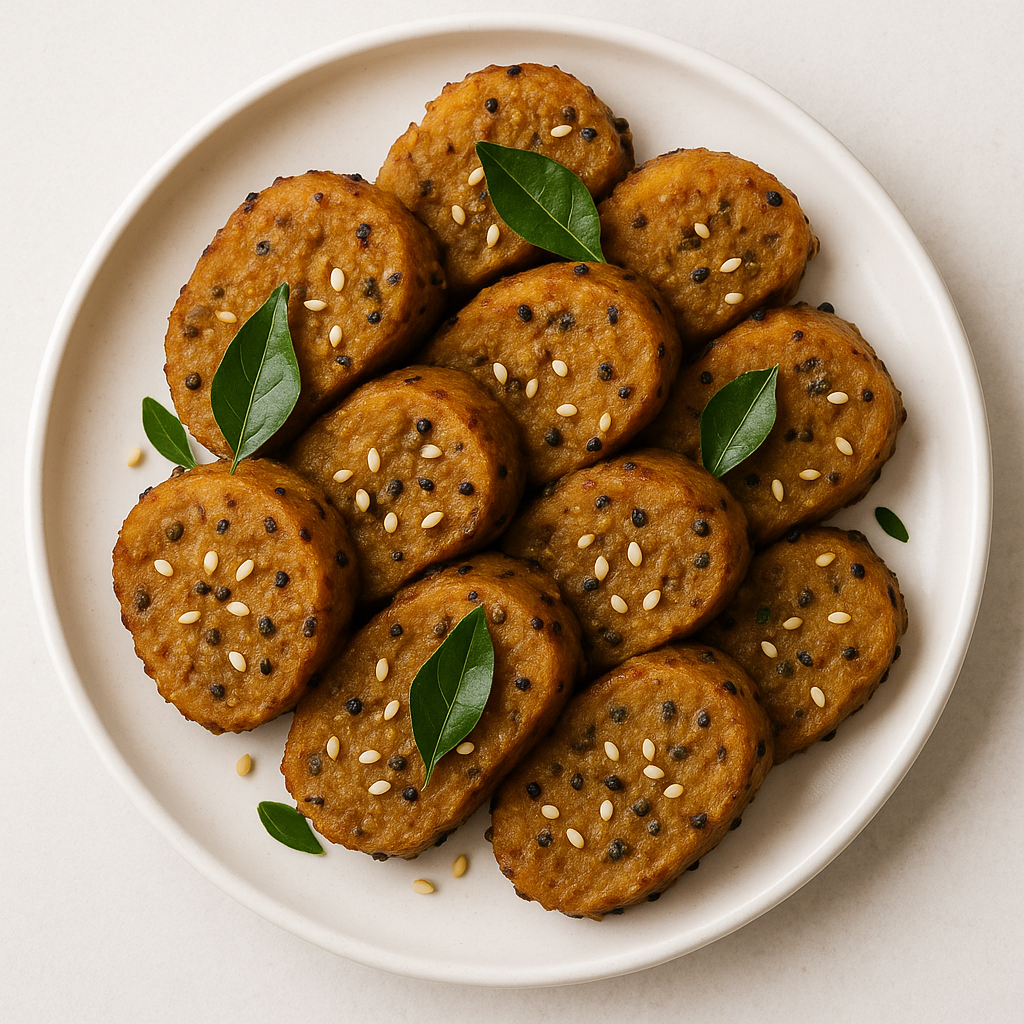
lauki mittai

Ingredients:

  • 1½ cups grated bottle gourd (lauki)
  • 1 cup whole wheat flour
  • ½ cup oats flour
  • 1 tsp ginger-chili paste
  • ½ tsp turmeric powder
  • 1 tsp cumin powder
  • Salt to taste
  • 1 tsp oil for greasing

Method:

  1. Squeeze out excess water from lauki.
  2. Combine all ingredients into a soft dough.
  3. Shape into rolls and place in the steamer.
  4. Steam for 20–25 minutes.
  5. Slice and toss with a tempering of mustard seeds and curry leaves.

4 . Steamed Veg Momos

Delicate dumplings that taste indulgent but are oil-free.
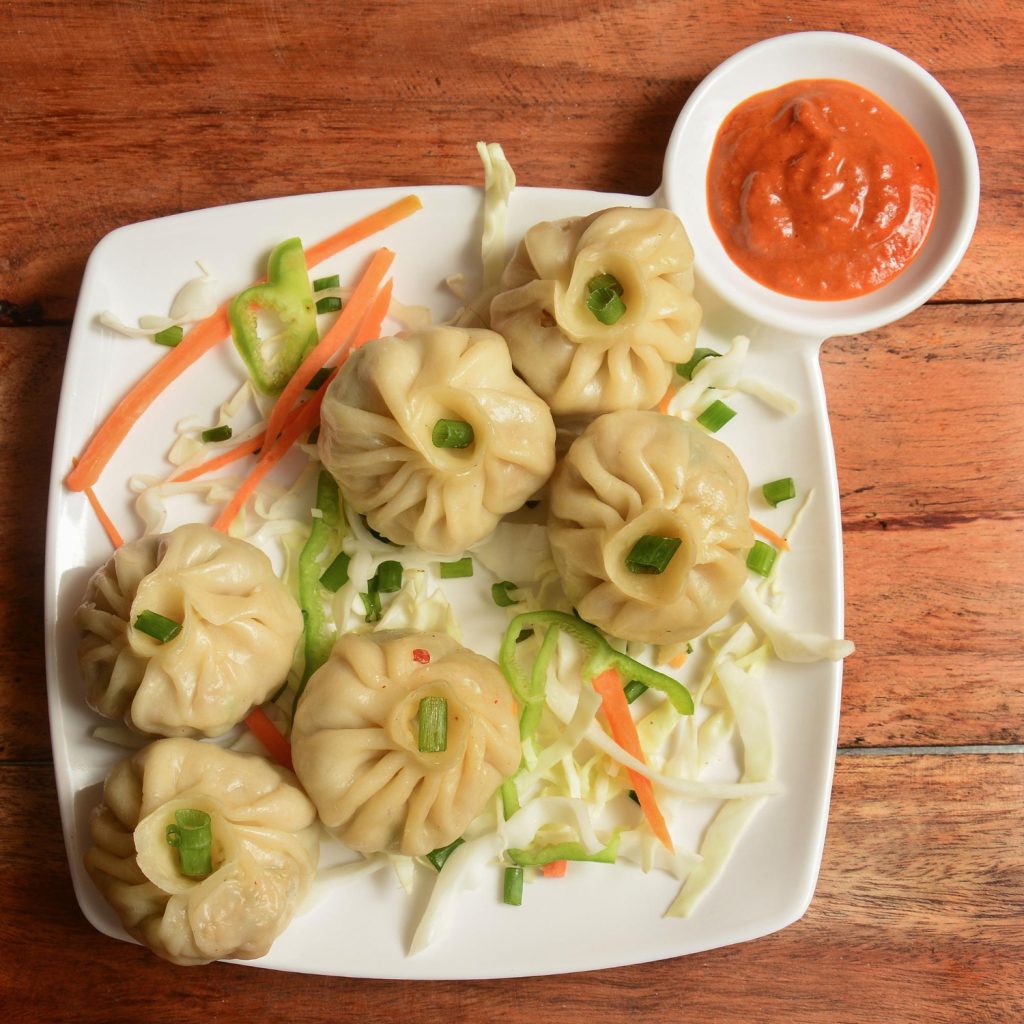
Steamed Momos

Ingredients:

Dough: 1 cup flour, ½ tsp salt, water as needed

Filling:

  • 1 cup finely chopped cabbage
  • ½ cup grated carrot
  • ½ cup crumbled paneer or tofu
  • 2 tbsp chopped green onions
  • 1 tsp soy sauce
  • 1 tsp ginger-garlic paste

Method:

  1. Prepare dough and rest for 10 minutes.
  2. Mix all filling ingredients.
  3. Fill and fold into momos.
  4. Steam for 10–12 minutes until translucent.
  5. Serve with spicy chili-garlic sauce.

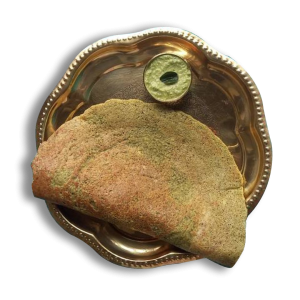
5 . Sweet Corn & Spinach Panki

A fragrant, healthy Gujarati snack wrapped in banana leaves.
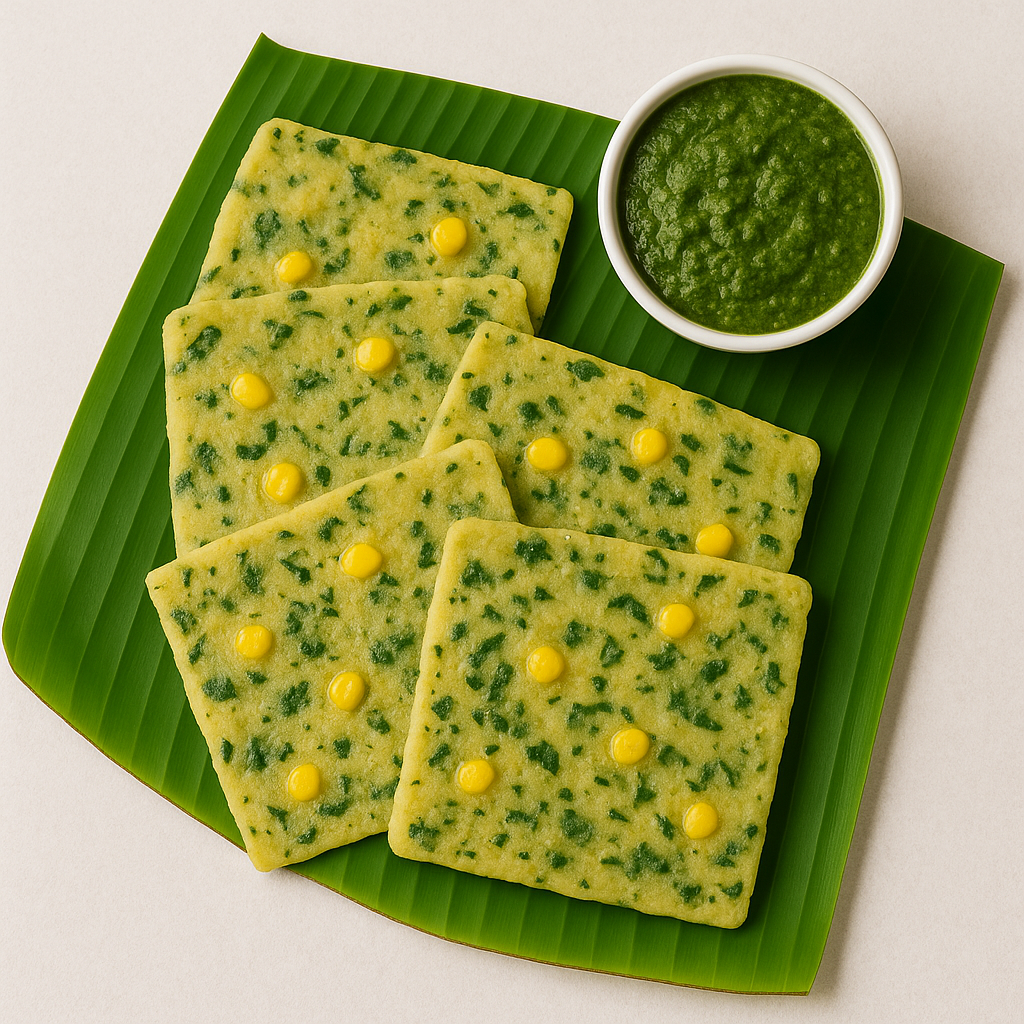
Sweet Corn Spinach Panki

Ingredients:

  • 1 cup rice flour
  • ½ cup spinach puree
  • ½ cup boiled corn kernels
  • ¼ cup yoghurt
  • 1 tsp ginger-chili paste
  • Salt to taste
  • Banana leaves (cut into squares)

Method:

  1. Mix all ingredients to form a thick batter.
  2. Spread between greased banana leaf squares.
  3. Steam for 10–15 minutes.
  4. Peel and serve warm.

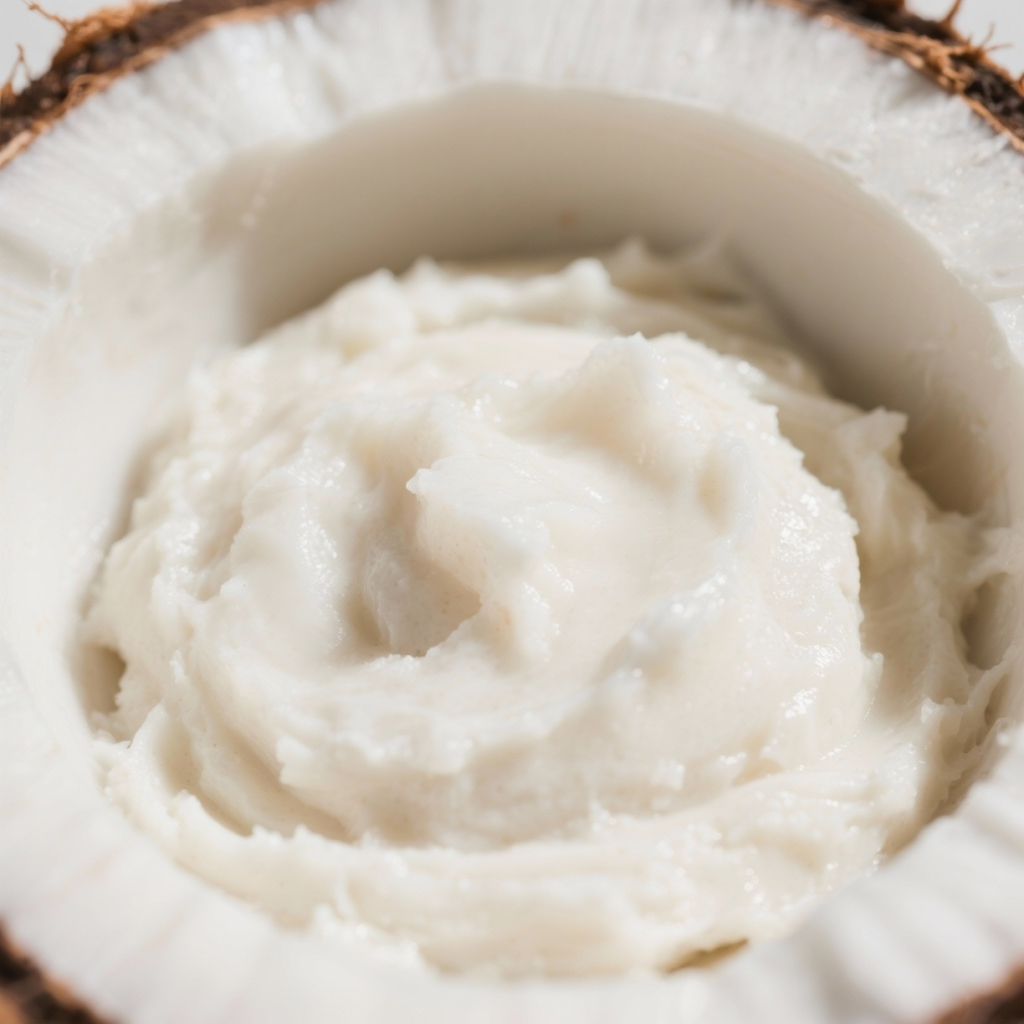
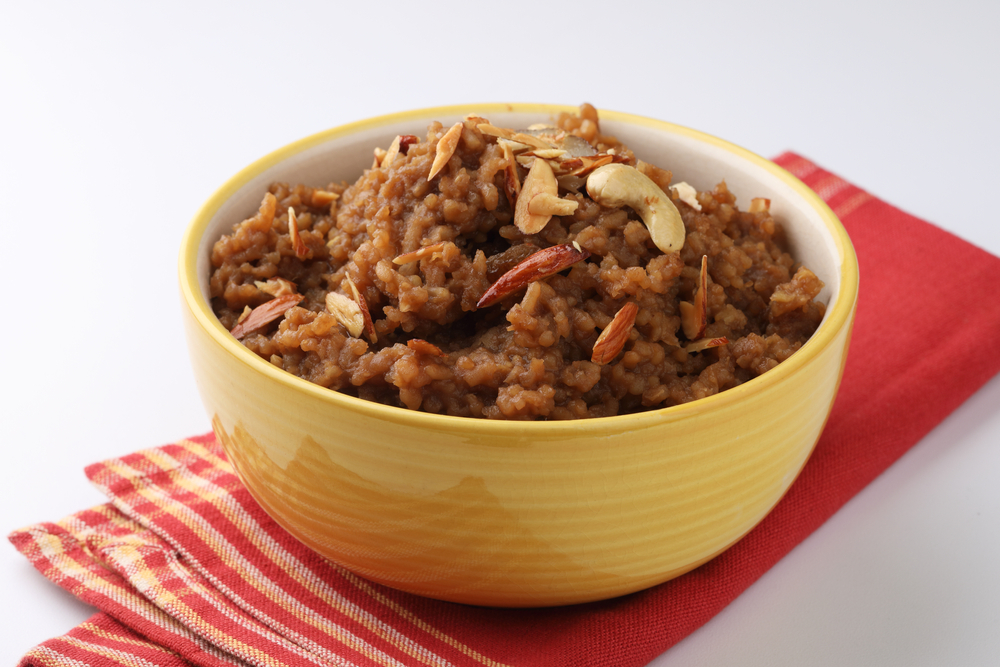
6 . Rice Flour Modaks

A festive favourite made healthier.

Kozhukattai or Modak Recipes

Ingredients:

  • 1 cup rice flour
  • 1¼ cups water
  • 1 tsp ghee
  • Pinch of salt

Filling:

  • 1 cup grated coconut
  • ¾ cup jaggery
  • ¼ tsp cardamom powder

Method:

  1. Boil water, ghee, and salt. Add rice flour, mix, and knead into dough.
  2. Cook coconut and jaggery together with cardamom until thick.
  3. Fill and shape into modaks.
  4. Steam for 10–15 minutes. Serve with a drizzle of ghee.

7 . Steamed Besan Squares

Soft, tangy and hearty.

Steamed Besan Recipe

Ingredients :

  • 1 cup besan (gram flour)
  • ½ cup tamarind water
  • ½ tsp turmeric powder
  • ½ tsp red chili powder
  • Salt to taste

Tempering :

Mustard seeds, sesame seeds, curry leaves

Method:

  1. Mix all ingredients into a smooth batter.
  2. Pour into greased tray and steam 20–25 minutes.
  3. Slice and top with tempering.

8 . Paneer & Oats Dumplings

Protein-rich, filling, and light.
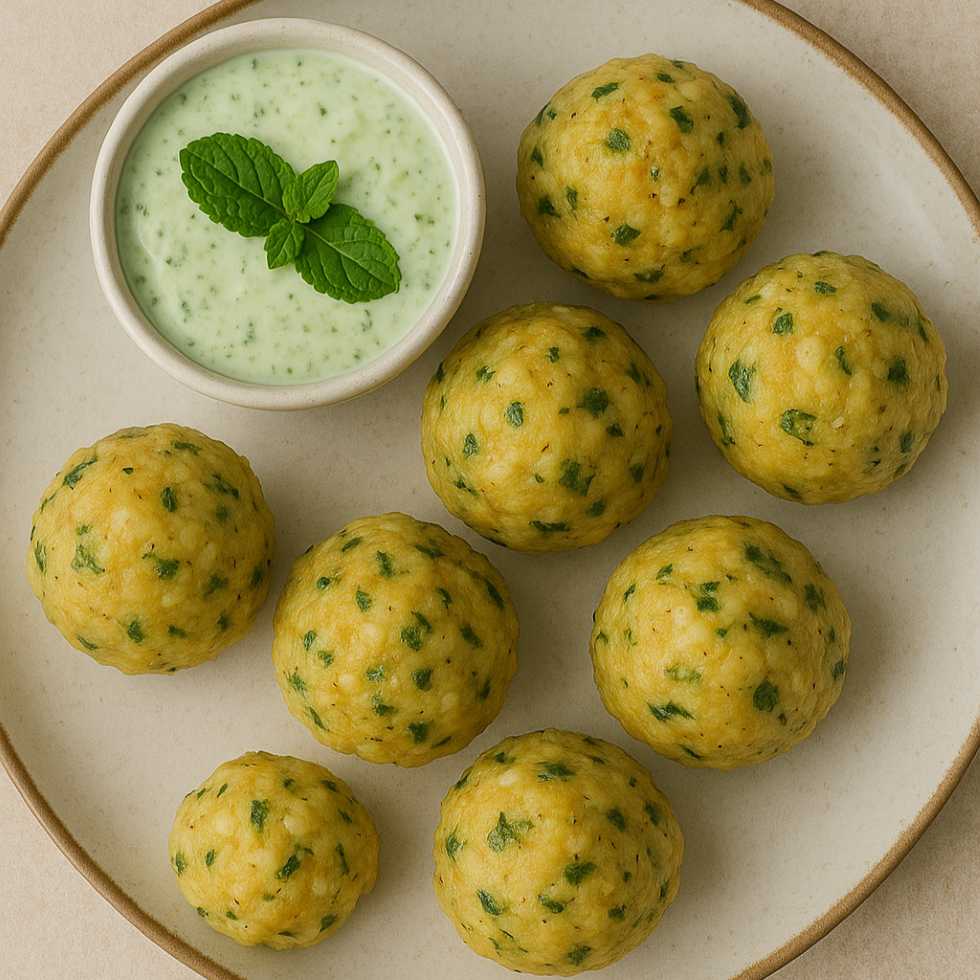
oats panner dumpling recipe

Ingredients:

  • 1 cup grated paneer
  • ½ cup oats flour
  • 1 chopped onion
  • 1 tsp cumin powder
  • Salt and pepper to taste

Method:

  1. Mix ingredients into thick mixture.
  2. Shape into small dumplings.
  3. Steam for 10–12 minutes.
  4. Serve with mint-yoghurt dip.
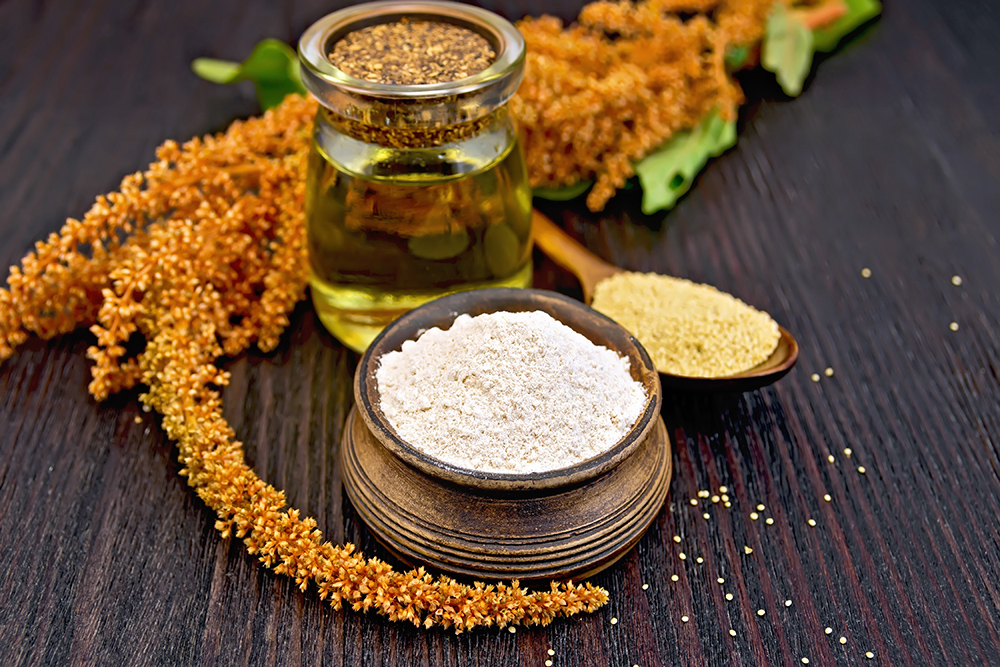
9 . Millet Puttu

A nutritious South Indian breakfast option.
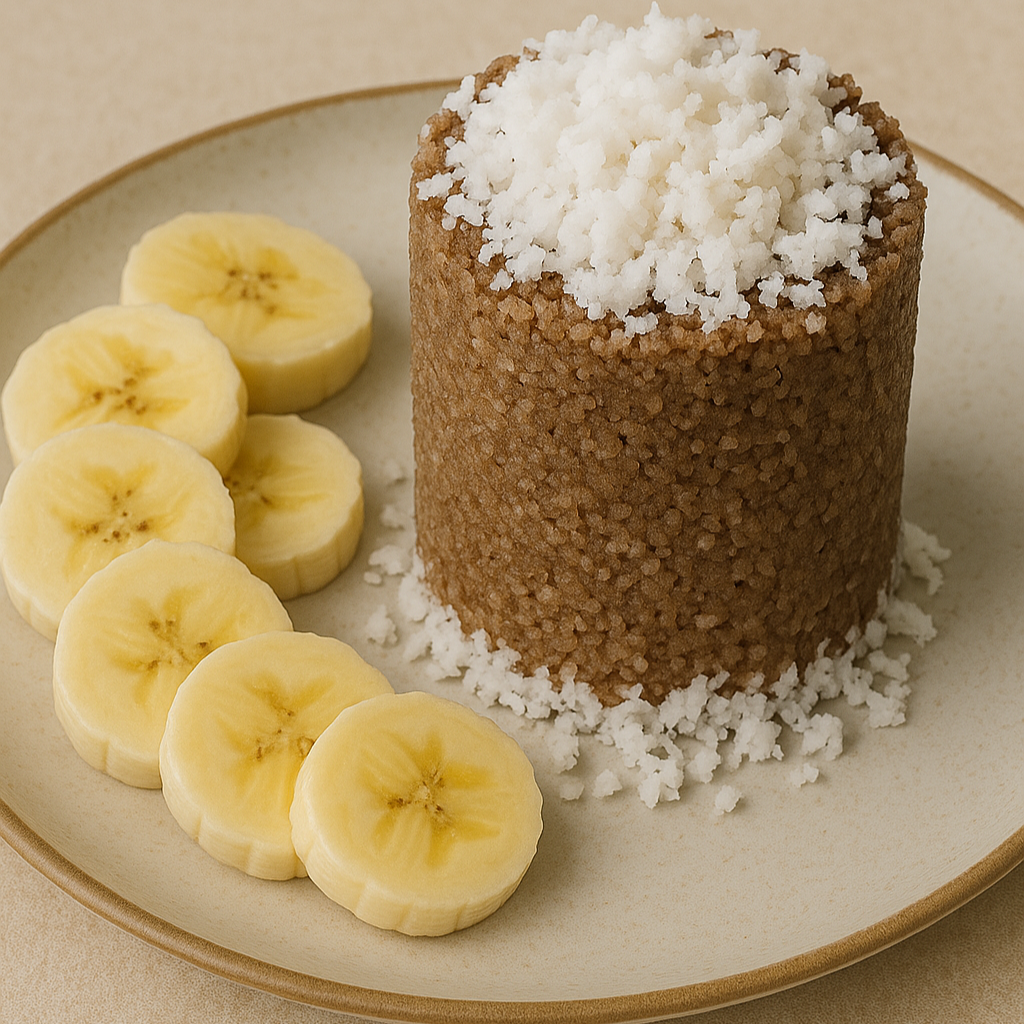
millet puttu recipe

Ingredients :

  • 1 cup millet flour
  • ½ cup grated coconut
  • ¼ cup water
  • Salt to taste

Method:

  1. Moisten flour with water and salt until crumbly.
  2. Layer flour and coconut alternately in tray.
  3. Steam for 10–15 minutes.
  4. Serve with banana or coconut milk.

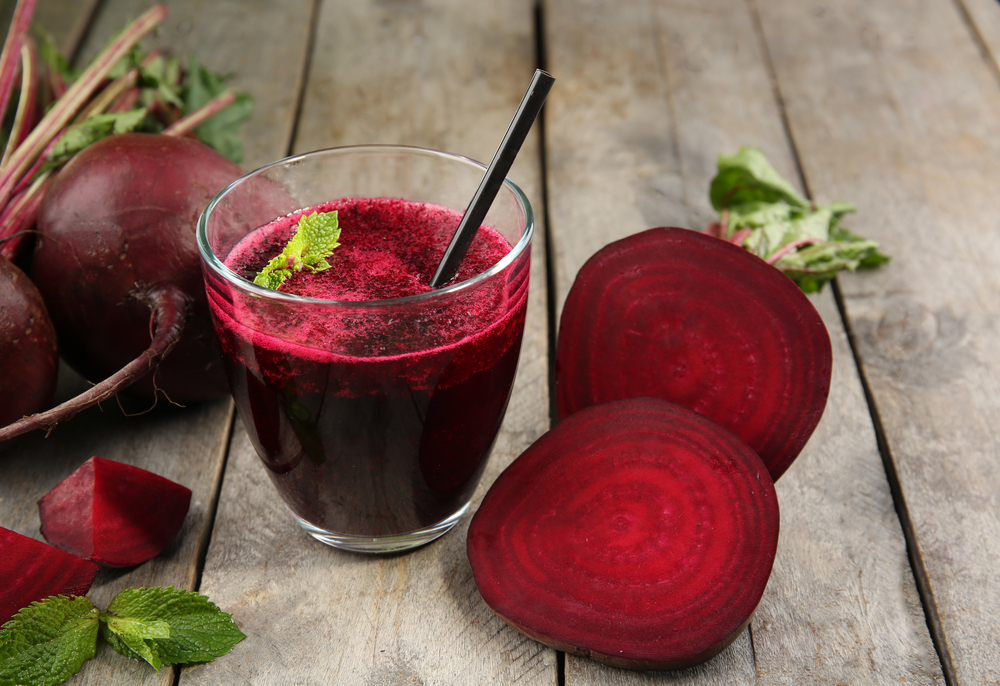
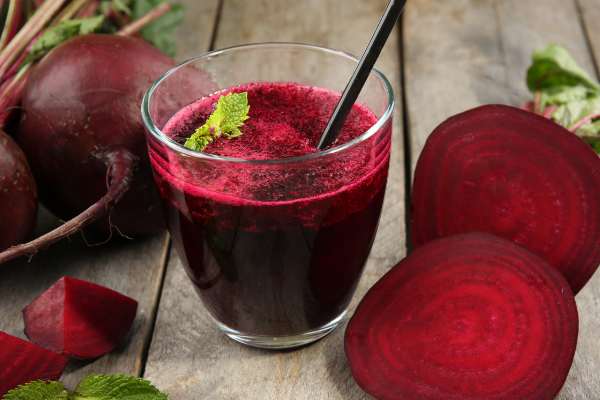
10 . Beetroot Idiyappam

A vibrant and colourful twist on traditional string hoppers.
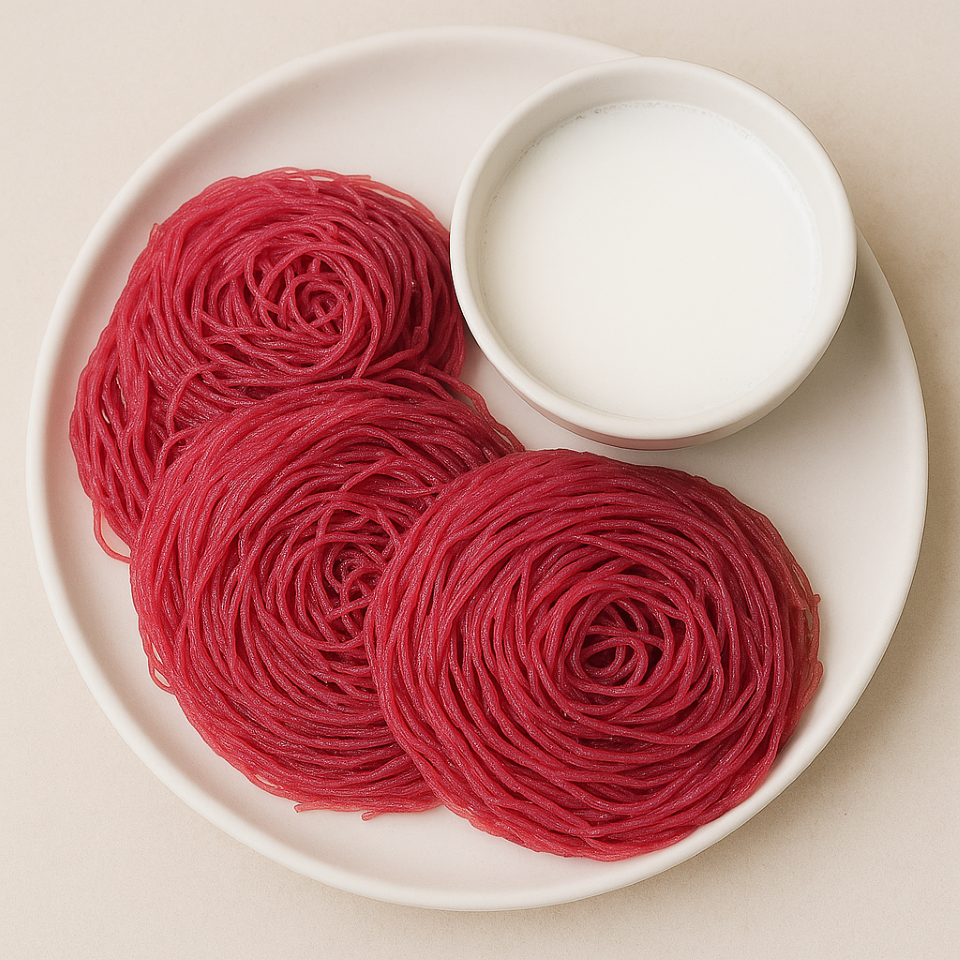
beetroot idiyappam recipe

Ingredients:

  • 1 cup roasted rice flour
  • ½ cup beetroot juice
  • ½ cup water
  • 1 tsp oil
  • Pinch of salt

Method:

  1. Boil beetroot juice, water, salt, and oil.
  2. Mix into rice flour to form soft dough.
  3. Press into idiyappam mould and steam 8–10 minutes.
  4. Serve with coconut milk or veg stew.

5-Minute Steaming Hack

  • Prepare batters or fillings in advance
  • Grease trays lightly before loading
  • Stack multiple trays for efficiency

Set the timer on your Ultra Diet Steamer and relax, it shuts off automatically

Conclusion: Ready to Steam Up Your Snack Game?

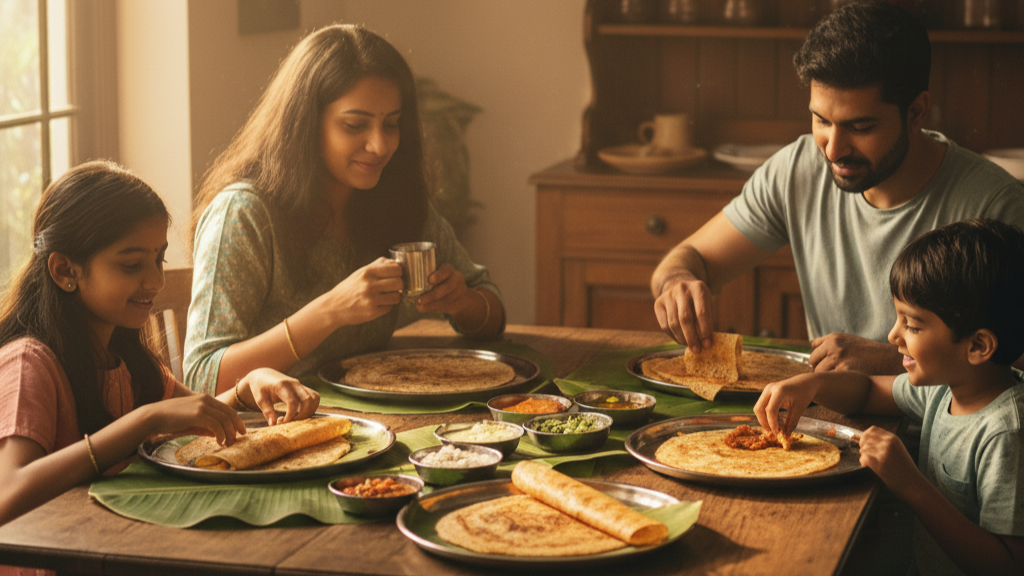
Steamed snacks are not just for diet lovers. They’re for anyone who enjoys real flavours without compromise. With the Ultra Diet Steamer by Elgi Ultra, healthy cooking becomes effortless, versatile, and fun.

Start with one recipe today, tag your kitchen triumphs, and watch your family ask for seconds, guilt-free.

Happy Steaming!

Your taste buds and your heart will thank you.

diet-steamer

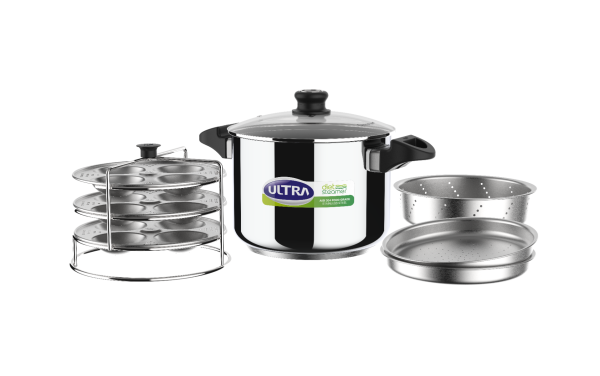
Elgi Ultra Diet Steamer

Steaming is the only cooking method that does not disturb the molecular structure of food, which plays an important role in retaining minerals and vitamins.

AISI 304 FOOD-GRADE STAINLESS STEEL

The steamer pot, idli plates, trays & stand are all made with rust-resistant food safe stainless steel

TOUGHENED GLASS LID

Stronger and high impact- resistant than standard glass

BAKELITE HANDLES & KNOBS

Tough handles & knobs that are also heat resistant and hence safe to use

HIGH-IMPACT BONDED 3 LAYER COMPOSITE BASE

For even distribution of heat

INDUCTION COOKTOP COMPATIBLE

Compatible with both induction and gas cooktops

YEAR WARRANTY*

Valid in the country of purchase(*applicable on the steamer pot only) Refer user guide for terms & conditions

Buying a Mixer Grinder in 2026 : Everything You Should Know

Buying Guide Mixer Grinder

Feeling overwhelmed by endless mixer grinder options? You’re not alone. The Indian kitchen appliance market is packed with new features, designs, and smart technologies, but not all upgrades are worth your money.

This guide will help you cut through the confusion and find your perfect kitchen companion for 2026.

Why 2026 Is the Perfect Time to Upgrade

Upgrage to Latest Mixer Grinder

The Technology Revolution

Mixer grinders today are multi-functional tools built for modern kitchens.

  • Grind, mix, juice, and blend in one machine
  • Quieter motors with better insulation
  • Improved energy efficiency and speed control

The Durability Game-Changer

The best models in 2026 are built to last.

  • AISI 304 food-grade stainless steel jars and blades that are rust-free and non-toxic
  • Overload protection and jar interlocking safety for added security
  • ABS or metal bodies for better durability

Example : Elgi Ultra Stealth NEO 750W and Elgi Ultra Metamix 750W feature stainless steel jars, quiet operation, and safety systems that protect both motor and user.

The Affordability Factor

Premium performance is now more accessible than ever.

  • 700–900W motors available at mid-range prices
  • Long warranties (5 years on motor, 2 on product)
  • Better competition means more value for money

Understanding Mixer Grinder Basics

Motor Power: The Heart of the Machine

  • 750W: Perfect for small to medium families
  • 900W: Ideal for tougher ingredients like turmeric and coconut
  • 1200W+: Best for large families or semi-commercial use

Top pick : Elgi Ultra Topp+ 750W Liquidizer Mixer Grinder (4 Jars)

Sharp Bladed Jars

Blades and Jars: Where the Magic Happens

  • Serrated blades for fibrous or dry grinding
  • AISI 304 stainless steel jars for rust-free durability
  • Flow breakers to ensure even grinding
  • Jar interlock system for safer operation

Try : Elgi Ultra Metamix 750W

Motor Build and Noise Reduction

Modern mixer grinders use:

  • High-quality copper windings
  • Noise-absorbing design (seen in Elgi Ultra Stealth NEO 750W)
  • Overload protection to prevent burnout
Noisy vs New Noise reduced Grinders

The 2026 Feature Checklist

Hot (Worth it)

tick
  • Noise reduction and quiet operation
  • Overload protection and 5-year motor warranty
  • AISI 304 stainless steel jars and blades
  • Jar interlocking safety
  • Multiple speeds and pulse mode

Not (Overhyped)

cross 2
  • “German Technology” claims
  • “Shockproof body” buzzwords
  • “Lifetime warranty” (check fine print)
  • Decorative LEDs
  • Wi-Fi smart controls (not necessary yet)

Real-World Performance Test

Turmeric Test on Jars

The Turmeric Test

Recommended : Elgi Ultra Topp 750W 3-Jar Mixer Grinder

Coconut grind Test

The Coconut Challenge

Handles fibrous coconut evenly without overheating.

Fluffy Batter test

The Idli Batter Test

Creates fluffy, aerated batter with no lumps or heating.

Hidden Costs Nobody Mentions

  • Higher wattage doesn’t always mean higher electricity bills
  • Annual maintenance costs ₹500–₹1500 but increases lifespan
  • Always check for service center availability nearby

Step-by-Step Buying Strategy

Steps to Buying Mixer Grinder

Step 1: Assess Your Needs

Ask yourself :

  • How many people do I cook for?
  • What do I grind most often?
  • How much counter space do I have?
  • What’s my realistic budget?

Step 2: Research

  • Read user reviews
  • Check warranty details
  • Compare prices
  • Look for festive or online discounts

Step 3: Physical Test

  • Check the jar fitting and blade quality
  • Test the stability and build
  • Examine cord length and overall weight

Step 4: Purchase

  • Buy only from authorized dealers
  • Register your product for warranty
  • Keep manuals and receipts safe

Common Mistakes to Avoid

  • Don’t obsess over wattage alone
  • Avoid focusing only on the number of jars
  • Don’t buy purely based on brand names
  • Extra features aren’t always useful

Future-Proofing Your Purchase

2026 Trends to Watch

  • Smart integration with app-based controls
  • Eco-friendly materials and energy-efficient motors
  • Modular components for longer product life

Final Verdict

The best mixer grinder for 2026 is the one that matches your cooking style, family size, and budget, not just the one with the highest wattage.

Top Elgi Ultra Picks for 2026

1 . Elgi Ultra Topp 750W 3-Jar Mixer Grinder

2 . Elgi Ultra Topp+ 750W Liquidizer (4 Jars)

3 . Elgi Ultra Metamix 750W Mixer Grinder

4 . Elgi Ultra Stealth NEO 750W Mixer Grinder

Pro Tip : Always test with turmeric or coconut to truly evaluate performance.

In Short

Your ideal mixer grinder should :

  • Handle daily kitchen tasks with ease
  • Fit your budget comfortably
  • Come from a trusted brand with good service

Choose smart, cook better, and enjoy the ease of modern grinding.

Elgi Ultra Mixer Grinders

The Ultra range of mixer grinders are designed to provide healthy and nutritious food at the right texture and consistency

FITTED WITH METAL COUPLERS

Lasts a lifetime compared to ordinary rubber couplers

AISI 304 FOOD-GRADE STAINLESS STEEL

Rust-resistant food-grade stainless steel jars

STAINLESS STEEL METAL BODY

Sturdy, reliable and long lasting

SLOW JUICING FUNCTION

For thick, nutritious juice without crushed seeds

CHOPPER / KNEADER ATTACHMENTS

Tasks like chopping vegetables and kneading dough are made easier using extra smart attachments

ELECTRONIC SPEED SENSOR

Automatically corrects speed fluctuations and maintains the specified grinding speed to get the right texture & taste

5 Quick Lunchbox Ideas Using Pressure Cooker

Wholesome Indian Meals Made Easy for Your Busy Mornings

Packing a tasty, wholesome lunch every morning can be a challenge especially when time is tight. Whether you’re preparing meals for school-going children, busy office-goers, or even yourself, you need quick, healthy, and satisfying dishes that don’t compromise on taste. That’s where the humble pressure cooker comes in.

A pressure cooker is one of the most versatile tools in the Indian kitchen. It cooks food faster, locks in nutrients, and requires minimal monitoring making it ideal for preparing lunch in a hurry.

In this blog, we’ll share 5 delicious and quick recipes that you can whip up using your pressure cooker, perfect for your lunch box ideas Indian style.

Why Choose a Pressure Cooker for Lunch box Cooking?

Before we dive into the recipes, let’s look at why pressure cookers are a go-to in Indian households:

  • Time-saving: Dishes that usually take an hour cook in under 20 minutes.
  • Retains nutrients: Pressure cooking preserves vitamins and minerals.
  • Energy efficient: Uses less gas or electricity.
  • One-pot convenience: Less mess, fewer utensils to clean.

Whether you’re using a traditional model or a smart version like the ELGi Ultra Whistle Counter Pressure Cooker, these quick lunch box recipes are just a few whistles away!

1. Vegetable Pulao

A flavorful, lightly spiced rice dish loaded with vegetables perfect for kids and adults alike.

Ingredients:

  • 1 cup basmati rice
  • 1½ cups mixed chopped vegetables (carrot, beans, peas)
  • 1 sliced onion
  • 1 tsp ginger-garlic paste
  • 1 bay leaf, 2 cloves, 1 cardamom
  • Salt to taste
  • 1½ cups water
  • 1 tbsp ghee or oil

Method:

  1. Heat ghee in the cooker. Add spices, onion, and ginger-garlic paste. Sauté for 2 minutes.
  2. Add chopped vegetables and sauté for 2 more minutes.
  3. Add rinsed rice and mix gently.
  4. Add water and salt.
  5. Close the lid and cook for 2 whistles.
  6. Allow the pressure to release naturally. Fluff and pack with raita or papad.

Running late? Get your pulao done in minutes with the ELGi Ultra Whistle Counter Pressure Cooker no need to count whistles manually!

2. Masala Khichdi

A comforting, protein-rich meal made with rice and dal. It’s quick, easy, and gentle on the stomach.

Ingredients:

    • ½ cup rice
    • ½ cup moong dal
    • 1 onion, chopped
    • 1 tomato, chopped
    • ½ tsp turmeric
    • 1 tsp cumin seeds
    • Salt to taste
    • 2½ cups water
    • Optional: chopped vegetables, green chilies, and coriander

Method:

  1. Rinse rice and dal. In the cooker, sauté cumin, onion, and tomato.
  2. Add spices and chopped vegetables (optional).
  3. Add rice, dal, salt, and water.
  4. Pressure cook for 3 whistles.
  5. Garnish with coriander and a spoon of ghee.

 Looking for simple, healthy lunch box ideas Indian families love? This khichdi fits right in and your pressure cooker makes it effortless.

3. Paneer Bhurji & Jeera Rice Combo

A protein-packed favorite that kids also enjoy. Make the bhurji and rice together in a stackable insert if your pressure cooker allows.

Paneer Bhurji Ingredients:

  • 200g crumbled paneer
  • 1 chopped onion
  • 1 chopped tomato
  • 1 green chili (optional)
  • Spices: turmeric, garam masala, salt
  • 1 tbsp oil or ghee

Jeera Rice Ingredients:

  • 1 cup basmati rice
  • 1 tsp cumin seeds
  • Salt to taste
  • 1½ cups water

Method:

  1. In the bottom insert, prepare paneer bhurji by sautéing onions, tomatoes, and spices. Add paneer last.
  2. In the top insert, add rinsed rice, cumin, salt, and water.
  3. Stack the inserts and cook for 2 whistles.
  4. Cool, pack, and enjoy a full meal!

Pack a power lunch paneer and jeera rice, cooked together with zero hassle. That’s the Ultra advantage!

4. Pressure Cooker Pasta (Indian Style)

A kid-favorite with a desi twist! Use Indian spices to flavor a quick pasta dish they’ll love.

Ingredients:

  • 1½ cups pasta (penne or macaroni)
  • 1 onion and 1 tomato, chopped
  • 1 tsp ginger-garlic paste
  • ½ tsp red chili powder, ½ tsp garam masala
  • Salt to taste
  • 2¼ cups water
  • Cheese or coriander for garnish

Method:

  1. In the cooker, sauté onions and ginger-garlic paste. Add tomatoes and spices.
  2. Add pasta, salt, and water.
  3. Cook for 1 whistle on medium flame, then release pressure immediately.
  4. Mix well and top with cheese.

Forget store-bought meals make Indian-style pasta in your pressure cooker for a lunch box win!

5. Mixed Vegetable Kurma with Chapati

Kurma is a mild, coconut-based curry that goes perfectly with chapatis. Use your pressure cooker to speed it up.

Ingredients:

  • 1½ cups chopped vegetables
  • 1 chopped onion
  • 1 tsp ginger-garlic paste
  • 1 tsp fennel seeds
  • ½ cup coconut milk or paste
  • 1 tsp coriander powder, ½ tsp garam masala
  • Salt to taste
  • 1½ cups water

Method:

  1. In the cooker, heat oil and sauté fennel, onion, and ginger-garlic paste.
  2. Add vegetables and spices.
  3. Add water and pressure cook for 2 whistles.
  4. Add coconut milk, simmer for 2 mins. Serve with chapatis.

Need a vegetarian curry in 15 minutes flat? Ultra Pressure Cooker has your back.

Packing Tips for Indian Lunch boxes

      • Use steel tiffins to retain heat longer
      • Line with banana leaf for aroma (especially for rice dishes)
      • Pair dry items like bhurji with soft rotis or parathas
      • Include a small container of salad or curd
      • Always let pressure cooker-cooked food cool before sealing

Final Thoughts

With the right pressure cooker and a handful of ingredients, packing a hot, healthy lunch doesn’t have to be a morning challenge. Whether it’s flavorful pulao, protein-rich khichdi, or a pasta your kids won’t stop talking about these lunch box ideas Indian homes swear by are fast, wholesome, and totally doable.

So go ahead. Turn up the heat, close the lid, and let your pressure cooker do the rest.

Level up your lunch box game. Choose ELGi Ultra Pressure Cookers for fast, safe, and delicious cooking whistle after whistl

Ultra Pressure cookers

Elgi Ultra Pressure Cookers

A perfect companion in your kitchen, the Ultra range of pressure cooker’s features will delight you.

NO CHARRING

High-impact bonded base, helps prevent burning and sticking of food

FAST COOKING

High-impact bonded base, aids in faster cooking

STAYS WARM FOR LONGER

Keeps food warm for up to 2 hours

DISHWASHER SAFE

Dishwasher safe design, makes it easy to clean

BEAUTIFUL LOOKS

Impressive design, elegant to serve

10-YEAR WARRANTY

Valid in the country of purchase

top 10 dosa varaities

Top 10 Dosa Varieties You Can Prepare at Home

Bring South Indian Flavors to Your Kitchen

Dosa is one of India’s most iconic dishes. Crispy, golden, delicious, and deeply rooted in South Indian cuisine, it has become a breakfast favorite across the country and beyond. What makes dosa extraordinary is its versatility. From spicy masala dosa to soft set dosa and protein-rich pesarattu, there is a dosa for every taste.

To get the restaurant-style crispness and fermentation, dosa batter must be smooth, fluffy, and perfectly ground. This is where a high-performance ELGi Ultra Wet Grinder helps create the ideal batter texture.

Explore Wet Grinders here: ELGi Ultra Wet Grinder
(Visit: https://www.elgiultra.com/)

1. Plain Dosa

Prep Time: 10 mins (excluding soaking and fermentation)
Cook Time: 5 mins per dosa
Serves: 12–14 dosas

The base of all dosas, this classic version is a testament to the magic of fermented rice and urad dal batter. When cooked right, it’s golden, crispy, and slightly tangy a true staple.

Ingredients:

  • For the Batter:
    • 2 cups raw rice (idli rice or parboiled rice)
    • ½ cup urad dal
    • 1 tsp fenugreek seeds (methi)
    • 1 tsp salt (or to taste)
    • Water as required
  • For Cooking:
    • Oil or ghee for the tawa

Method :

  1. Soaking: Wash the rice, urad dal, and fenugreek seeds together in a bowl until the water runs clear. Soak them in clean water for at least 6-8 hours.
  2. Grinding: Drain the soaked ingredients and transfer them to your Ultra Wet Grinder. Add a little water at a time and grind until the batter is incredibly smooth, fluffy, and has a ribbon-like consistency. This is where the Ultra Wet Grinder’s precision is key.
  3. Fermentation: Transfer the batter to a large container, add salt, and mix well with your hands. Cover and let it ferment overnight (for 8-12 hours) in a warm place. The batter should rise and become slightly tangy.
  4. Cooking: Heat a non-stick tawa over medium-high heat. Grease it lightly with a few drops of oil. Pour a ladleful of batter in the center and spread it outwards in a thin, circular motion. Drizzle a little oil around the edges.
  5. Cook until the edges turn golden and crispy. Flip the dosa and cook for another minute. Serve hot with coconut chutney and sambar.

2. Masala Dosa

Prep Time: 20 mins
Cook Time: 6 mins per dosa
Serves: 10 dosas

A hearty twist on the plain dosa stuffed with a fragrant and spicy potato and onion filling. It’s a complete meal in itself.

Ingredients:

  • For the Masala Filling:
    • 3 medium potatoes, boiled and mashed
    • 1 large onion, finely chopped
    • 1 tsp mustard seeds
    • 1 tsp urad dal
    • A pinch of asafoetida (hing)
    • 1 tbsp ginger-garlic paste
    • 5-6 curry leaves
    • 1 green chili, finely chopped
    • ½ tsp turmeric powder
    • Salt to taste
    • 2 tbsp oil
    • Fresh coriander for garnish
  • For the Dosa:
    • Plain dosa batter (from the recipe above)
  • For Cooking:
    • Oil or ghee for the tawa

Method :

  1. Prepare the Filling: Heat oil in a pan. Add mustard seeds and let them splutter. Add urad dal, asafoetida, curry leaves, and green chili. Sauté for a few seconds.
  2. Add the chopped onions and a pinch of salt, and sauté until they turn translucent. Add the ginger-garlic paste and sauté until the raw smell disappears.
  3. Add the turmeric powder and the mashed potatoes. Mix well, ensuring there are no lumps. Add salt to taste and garnish with fresh coriander.
  4. Cook the Dosa: Follow the method for plain dosa. Once the dosa is cooked on one side, place a generous scoop of the masala filling in the center. Fold the dosa and serve hot with sambar and coconut chutney.

3. Rava Dosa (Instant)

Prep Time: 10 mins
Cook Time: 5 mins per dosa
Serves: 8 dosas

Crispy, lacy, and instant rava dosa uses no fermentation. It’s made with a thin batter of semolina, rice flour, and spices..

Ingredients:

  • For the Batter:
    • ½ cup semolina (rava)
    • ½ cup rice flour
    • ¼ cup all-purpose flour (maida)
    • 1 medium onion, finely chopped
    • 1 green chili, finely chopped
    • ½ tsp black peppercorns, crushed
    • 1 tsp cumin seeds
    • 5-6 curry leaves, chopped
    • 2 cups buttermilk or water
    • Salt to taste
    • A few cashews (optional)
  • For Cooking:
    • Oil or ghee for the tawa

Method :

  1. In a large bowl, whisk together the semolina, rice flour, and all-purpose flour.
  2. Add all the other ingredients for the batter (onion, chili, peppercorns, cumin, curry leaves, and salt).
  3. Gradually add the buttermilk or water to form a very thin, watery batter. The consistency should be like milk. Let the batter rest for 20-30 minutes before pouring.
  4. Cooking: Heat a non-stick tawa until very hot. The tawa should sizzle when you sprinkle a few drops of water on it.
  5. Stir the batter well before each dosa, as the semolina settles quickly. Pour the batter from the outer edge of the tawa towards the center in a circular motion. The batter should spread to create a lacy, porous texture.
  6. Drizzle oil around the edges and cook until it turns a deep golden brown. Do not flip this dosa. Serve immediately with chutney.

4. Mysore Dosa

Prep Time: 25 mins
Cook Time: 6 mins per dosa
Serves: 8 dosas

Famous in Karnataka, this variety is layered with a fiery red chutney and sometimes filled with potato masala. It’s spicy, tangy, and unforgettable.

Ingredients:

  • For the Red Chutney:
    • 4-5 dried red chilies
    • 4-5 cloves of garlic
    • 1 small onion, chopped
    • A small gooseberry-sized ball of tamarind
    • Salt to taste
    • A little water for grinding
  • For the Dosa:
    • Plain dosa batter (from the recipe above)
  • For Cooking:
    • Oil or ghee for the tawa
    • Potato masala (optional, from the masala dosa recipe)

Method :

  1. Prepare the Chutney: Soak the red chilies and tamarind in hot water for 15 minutes.
  2. In a blender or a small jar of your mixer grinder, grind the soaked chilies, tamarind, garlic, onion, and salt with a little water to form a thick, spicy paste.
  3. Cook the Dosa: Heat a tawa and pour a ladleful of dosa batter, spreading it into a thick circle. Do not spread it too thin.
  4. When the dosa is half-cooked, spread a teaspoon of the red chutney paste evenly over the top.
  5. Drizzle oil and cook until golden brown and crispy. If using, place a small portion of potato masala in the center and fold the dosa. Serve hot with sambar.

5. Set Dosa

Prep Time: 10 mins (plus fermentation time)
Cook Time: 4 mins per dosa
Serves: 12 small dosas

Soft, thick, and served in a set of three, this is a popular breakfast in Bengaluru. The secret to its melt-in-your-mouth texture is the addition of cooked rice or poha (flattened rice) to the batter.

Ingredients:

  • For the Batter:
    • 2 cups idli rice
    • ½ cup urad dal
    • ½ cup cooked rice or poha
    • 1 tsp fenugreek seeds
    • Salt to taste
  • For Cooking:
    • Oil or ghee for the tawa

Method :

  1. Soaking: Wash and soak the rice, urad dal, and fenugreek seeds for 6-8 hours. If using poha, soak it for only 15 minutes right before grinding.
  2. Grinding: Drain the water and grind the rice, dal, and fenugreek seeds in your Ultra Wet Grinder. Add the cooked rice or poha towards the end and grind until the batter is very soft, airy, and fluffy.
  3. Fermentation: Transfer the batter to a container, add salt, and let it ferment overnight. The consistency should be thicker than plain dosa batter.
  4. Cooking: Heat a non-stick tawa. Pour a ladleful of the thick batter and spread it into a small, thick circle. Unlike other dosas, you don’t spread it too thin.
  5. Cook on medium heat until the dosa develops small bubbles and the bottom turns light golden. Flip it and cook the other side.
  6. Serve three of these soft dosas together in a “set,” with a generous serving of coconut chutney and vegetable kurma.

6. Neer Dosa

Prep Time: 10 mins + soaking
Cook Time: 3 mins per dosa
Serves: 15 thin dosas

A delicacy from Karnataka’s coastal region, this dosa is made with soaked rice and requires no fermentation. It’s light, delicate, and looks like a beautiful, lacy crepe.

Ingredients:

  • For the Batter:
    • 2 cups idli rice
    • ½ cup urad dal
    • ½ cup cooked rice or poha
    • 1 tsp fenugreek seeds
    • Salt to taste
  • For Cooking:
    • Oil or ghee for the tawa
Neer Dosa

Method :

  1. Soaking & Grinding: Wash and soak the raw rice for 4-5 hours. Drain the water and grind the soaked rice along with grated coconut (if using) in your Ultra Wet Grinder. Add water to get a very thin, watery batter the consistency of milk or thin buttermilk. Add salt to taste.
  2. Cooking: Heat a non-stick tawa over medium-high heat. Drizzle a little oil on it.
  3. Pour a ladleful of the watery batter from a height, starting from the outer edge of the tawa and moving inwards. The batter will sizzle and spread to create a beautiful, lacy texture.
  4. Cook on medium-low heat. Neer dosa is so thin that you don’t need to flip it. It’s ready when the edges curl up slightly.
  5. Carefully fold it and remove it from the tawa. Serve hot with coconut chutney, sambar, or spicy chicken curry for an authentic combo.

7. Onion Dosa

Prep Time: 10 mins
Cook Time: 5 mins per dosa
Serves: 10 dosas

Simple yet flavorful, this dosa includes finely chopped onions, green chilies, and coriander added directly to the batter or sprinkled on top.

onion dosa

Ingredients:

  • For the Dosa:
    • Plain dosa batter (from the recipe above)
    • 1 large onion, finely chopped
    • 1 green chili, finely chopped
    • A handful of fresh coriander, chopped
  • For Cooking:
    • Oil or ghee for the tawa

Method :

  1. Prepare the Batter: Take a portion of your plain dosa batter. Add the finely chopped onions, green chili, and fresh coriander. Mix well. The batter should not be too thick; if it is, add a little water.
  2. Cooking: Heat a non-stick tawa over medium heat. Pour a ladleful of the batter in the center and spread it into a thin, circular dosa.
  3. Drizzle oil around the edges. Cook until the bottom is light golden and crispy. The onions in the batter will caramelize slightly, adding a wonderful sweetness and crunch.
  4. Flip and cook the other side for a minute. Serve hot with any chutney of your choice.

8. Cheese Dosa

Prep Time: 5 mins
Cook Time: 5 mins per dosa
Serves: 8 dosas

A kid-favourite and perfect for fusion lovers, cheese dosa melts hearts with grated cheese layered over a half-cooked dosa.

Ingredients:

  • For the Dosa:
    • Plain dosa batter (from the recipe above)
  • For the Topping:
    • 1/2 cup grated mozzarella or cheddar cheese
    • Finely chopped onions, bell peppers, or sweet corn (optional)
  • For Cooking:
    • Oil or ghee for the tawa
cheese dosa recipe

Method :

  1. Cook the Dosa: Heat a non-stick tawa and pour a ladleful of plain dosa batter, spreading it into a thin circle. Drizzle oil and let it cook.
  2. When the dosa is cooked on the bottom and half-cooked on the top, sprinkle a generous amount of grated cheese evenly over the surface.
  3. You can also sprinkle finely chopped onions, capsicum, and corn at this point for a more wholesome bite.
  4. Cover the tawa with a lid for about a minute to help the cheese melt.
  5. Once the cheese is gooey and melted, fold the dosa in half and serve immediately. This dosa is best enjoyed hot and fresh.

9. Moong Dal Dosa (Pesarattu)

Prep Time: 10 mins + soaking
Cook Time: 5 mins per dosa
Serves: 10 dosas

High in protein and fibre, this Andhra-style dosa is made using green gram (moong dal), ideal for weight-watchers.

Ingredients:

  • For the Batter:
    • 1 cup whole green gram (moong dal)
    • 1-inch piece of ginger
    • 2 green chilies
    • A small handful of fresh coriander
    • Salt to taste
  • For Serving:
    • Upma filling (optional)
    • Ginger chutney (optional)
    • Finely chopped onions and green chilies
  • For Cooking:
    • Oil or ghee for the tawa

Method :

  1. Soaking & Grinding: Wash and soak the moong dal for 4-6 hours. Drain the water and grind the dal along with ginger, green chilies, and coriander in your Ultra Wet Grinder with just enough water to make a smooth, slightly thick batter. Add salt to taste.
  2. Cooking: Heat a non-stick tawa. Pour a ladleful of the batter and spread it into a thin, even circle.
  3. Sprinkle finely chopped onions and green chilies on top. Drizzle oil around the edges.
  4. Cook on medium heat until the dosa turns golden brown and crispy. Flip it and cook for another minute.
  5. Serve hot with a dollop of upma filling inside and a side of traditional ginger chutney for an authentic combo.

10. Beetroot Dosa

Prep Time: 15 mins
Cook Time: 5 mins per dosa
Serves: 8 dosas

Bright and nutritious, this dosa is made by adding beetroot puree to the basic batter—great for kids and health-conscious eaters.

Ingredients:

  • For the Batter:
    • 1.5 cups plain dosa batter
    • ½ cup beetroot puree (from 1 medium beetroot)
  • For Cooking:
    • Oil or ghee for the tawa

Method :

  1. Prepare the Puree: Peel and chop one medium beetroot. Boil it in a little water until soft. Let it cool and blend it into a smooth puree in your mixer grinder.
  2. Mix the Batter: In a bowl, mix the plain dosa batter with the beetroot puree. Adjust the consistency by adding a little water if needed. The batter should have a beautiful vibrant pink or red color.
  3. Cooking: Heat a non-stick tawa. Pour a ladleful of the beetroot batter and spread it into a thin, circular dosa. Drizzle oil around the edges.
  4. Cook on medium heat until the dosa is firm and the edges turn slightly crispy. Flip and cook for another minute. The color will darken beautifully.
  5. Serve with a simple coconut chutney, which provides a lovely contrast to the subtle sweetness of the beetroot. You can also experiment with spinach or carrot puree for different colors and a nutritional boost.

Pro Tips for Perfect Dosas Every Time

  1. Use the right ratio: A 4:1 ratio of rice to urad dal is ideal for most classic dosa batters.
  2. Use a wet grinder: The ELGi Ultra Wet Grinder ensures smooth, fluffy batter that ferments better than any blender.
  3. Let it ferment properly: Batter should rise and have a light sour aroma. Keep it in a warm spot.
  4. Use a cast iron tawa: For that crispy edge and golden colour.
  5. Stir the batter gently before use: Never overmix post-fermentation.

Why ELGi Ultra Makes the Difference

When it comes to dosa preparation, the quality of the batter determines texture, taste, and authenticity. The ELGi Ultra Wet Grinder is a trusted companion in Indian kitchens for a reason :

  • Heavy-duty motors for consistent grinding
  • Patented conical stones to prevent overheating
  • Food-grade stainless steel drum for hygiene
  • Long life, low noise, and energy efficient
  • Large capacity for family-sized batches

Whether you’re preparing classic plain dosa or experimenting with spinach-beetroot fusions, Ultra gives you the perfect base every single time.

Shop Ultra Wet Grinders: www.elgiultra.com

Bonus : Dosa Batter Storage Tips

  • Store fermented batter in an airtight container in the fridge
  • Add a pinch of salt before refrigerating to extend freshness
  • Use a clean ladle each time to avoid contamination
  • Consume within 3–5 days for the best results

Serving Suggestions

Pair your dosa variety with:

  • Coconut chutney
  • Tomato chutney
  • Mint-coriander chutney
  • Sambar with vegetables
  • Gunpowder (idli podi) and ghee

Want to go fusion? Try dosa with hummus, peanut butter, or even jam!

Final Thoughts

The beauty of dosa lies in its versatility. Whether you want something spicy, sweet, soft, or crisp there’s a dosa variety waiting to delight your palate. And when you make your own batter using the ELGi Ultra Wet Grinder, you’re not just preparing food you’re celebrating tradition, health, and flavor at home.

Dosa is more than food, it is comfort, culture, and a culinary delight. With the right batter and the ELGi Ultra Wet Grinder, you can prepare any dosa variety at home with authentic South Indian taste.

So what’s your dosa mood today?

 Explore the entire Ultra range and get started on your dosa journey because great batter is the secret to every great dosa

varieties of dosa with family
wet-grinder-bigg+T

Elgi Ultra Grinder

Ultra is the pioneer in compact table top wet grinders and innovator of the patented conical stones. The patented conical stone design makes the batter smooth.

PATENTED CONICAL STONES

For effective grinding without high batter temperature rise

AISI 304 STAINLESS STEEL

Rust-resistant food-grade stainless steel drum for healthy food

ABS BODY

Lighter weight, longer life and great looks

150-WATT MOTOR

Powerful 150W motor for better grinding

2.5L WET GRINDER

Ideal for a family of 4

DIGITAL TIMER

Beep alert & auto switch-off at preset grinding time

MULTI UTILITY DRUM

Batter can be stored in the same drum after grinding

BATTER CLEANER

For easy cleaning of conical stones

One-Pot Sunday Specials in the Pressure Cooker

Comfort Food Made Easy with a Modern Twist

Sundays are made for slowing down, catching up with family, and indulging in wholesome meals that soothe the soul. Whether it’s a bubbling biryani, a hearty khichdi, or a comforting stew, one-pot dishes are the perfect choice for a relaxed weekend. They bring together rich flavors and require minimal clean-up — a win-win for home cooks.

With a reliable Triply krono pressure cooker, your favorite Sunday meals cooker style can be prepared faster, with all the depth and authenticity intact. Let’s explore how you can make these Sunday specials even easier using Ultra Pressure Cookers.

Why One-Pot Meals Are Sunday Favorites?

One-pot cooking is more than a time-saver — it’s a tradition in many Indian households. Whether it’s rajma chawal in the north, sambar rice in the south, or vegetable pulao in the west, these meals are rooted in simplicity and flavor. They’re easy to make, hearty, and satisfying enough to anchor a family meal.

But often, these comfort foods take hours to simmer and develop flavor. That’s where smart tools like pressure cookers help bridge tradition with convenience.

How a Pressure Cooker Transforms Sunday Cooking?

Using a pressure cooker allows ingredients to cook together in their own juices, locking in flavor while reducing cooking time. With the UltraTriply krono Pressure Cooker, you get:

Even heat distribution

Faster cooking without overcooking

Energy efficiency

Safe and hassle-free handling

You’re not just saving time — you’re preserving authenticity with ease.

5 Easy One-Pot Sunday Meals in a Pressure Cooker

Here are some classic recipes to try in your Sunday meals cooker, with detailed ingredients and cooking steps for each.

Vegetable Pulao

Aromatic basmati rice cooked with a medley of fresh vegetables and fragrant spices. This one-pot wonder is a staple for a relaxed Sunday lunch, offering a perfect blend of taste and nutrition.

Ingredients:

For the Pulao:

  • 1.5 cups Basmati rice, rinsed and soaked for 20 minutes
  • 2 tablespoons Ghee or oil
  • 1 large Onion, thinly sliced
  • 1 cup mixed vegetables (carrots, peas, beans, cauliflower), chopped
  • 2 Green chilies, slit lengthwise
  • 1 tablespoon Ginger-garlic paste
  • 1 teaspoon Turmeric powder
  • 1 teaspoon Garam masala powder
  • 1 teaspoon Coriander powder
  • 2.5 cups Water
  • Salt to taste

For the Whole Spices:

  • 2-3 Green cardamoms
  • 2 Cloves
  • 1 Bay leaf
  • 1 small piece Cinnamon stick
  • 1 teaspoon Cumin seeds

For the Garnish:

  • A handful of fresh coriander leaves, chopped

Cooking Steps:

  1. Heat ghee or oil in the Ultra Pressure Cooker on medium heat. Add the whole spices (cardamom, cloves, bay leaf, cinnamon, cumin seeds) and sauté until fragrant, about 30 seconds.
  2. Add the sliced onions and green chilies. Sauté until the onions turn a light golden brown.
  3. Stir in the ginger-garlic paste and cook for one minute until the raw smell disappears.
  4. Add the chopped mixed vegetables and sauté for 2-3 minutes.
  5. Add the turmeric powder, garam masala, and coriander powder. Mix well and cook for another minute.
  6. Drain the soaked basmati rice and add it to the cooker. Stir gently to coat the rice with the spices and vegetables.
  7. Pour in the water and add salt to taste. Mix everything well.
  8. Close the cooker lid and place the weight on top. Cook on high heat until the cooker whistles once.
  9. Immediately reduce the heat to low and cook for 5 minutes.
  10. Turn off the heat and let the pressure release naturally.
  11. Once the pressure is fully released, open the lid, fluff the pulao gently with a fork, and garnish with fresh coriander leaves.

Ingredients:

For the Sambar Rice:

  • 1 cup Toor dal
  • 1 cup Rice
  • 1 large Onion, thinly sliced
  • 3 cups mixed vegetables (drumsticks, pumpkin, carrots, beans, brinjal), chopped
  • 1 large Onion, chopped
  • 2 Tomatoes, chopped
  • 1 teaspoon Turmeric powder
  • 2 tablespoons Sambar powder
  • 1 tablespoon Tamarind pulp
  • 5 cups Water
  • Salt to taste

For the Whole Spices:

  • 2 tablespoons Ghee or oil
  • 1 teaspoon Mustard seeds
  • 1 teaspoon Fenugreek seeds
  • 2-3 Red chilies
  • A pinch of Asafoetida (hing)
  • 1 sprig Curry leaves

For the Garnish:

  • Fresh coriander leaves, chopped

South Indian Sambar Rice

A heartwarming and wholesome comfort food, this one-pot dish combines spicy, tangy sambar with soft-cooked rice and a generous helping of vegetables.

Cooking Steps:

  1. Wash and rinse the toor dal and rice together. Set aside.
  2. Heat ghee or oil in the Ultra Pressure Cooker. Add mustard seeds and let them splutter. Add fenugreek seeds, red chilies, asafoetida, and curry leaves. Sauté for a few seconds.
  3. Add the chopped onions and cook until translucent. Add the chopped tomatoes and cook until they turn soft and mushy.
  4. Add all the chopped vegetables, turmeric powder, and sambar powder. Sauté for 2-3 minutes.
  5. Add the washed dal and rice mixture to the cooker. Stir well.
  6. Pour in the water and tamarind pulp, and add salt. Mix everything thoroughly.
  7. Close the cooker lid with the weight. Cook on high heat for 3-4 whistles. The Ultra Pressure Cooker’s precise pressure regulation ensures the dal cooks perfectly without getting mushy, maintaining its texture.
  8. Let the pressure release naturally. Open the lid and mash the contents slightly with a ladle.
  9. Garnish with fresh coriander leaves and serve hot with a dollop of ghee.

Less mess. More taste. Try one-pot cooking with Ultra Pressure Cooker today! Explore Ultra Pressure Cookers now!

Rajma Masala with Rice

A beloved North Indian Sunday staple, this dish features soft, creamy kidney beans slow-cooked in a rich tomato-onion gravy, served with fluffy rice.

Ingredients:

For the Rajma:

  • 1 cup Toor dal
  • 2 large Onions, finely chopped
  • 2 Tomatoes, puréed
  • 1 tablespoon Ginger-garlic paste
  • 1 teaspoon Turmeric powder
  • 1 teaspoon Garam masala
  • 1 teaspoon Coriander powder
  • 1/2 teaspoon Red chili powder
  • 2 tablespoons Ghee or oil
  • 3-4 cups Water
  • Salt to taste

For the Tempering:

  • 1 teaspoon Cumin seeds
  • 1 teaspoon Mustard seeds
  • 2 Cloves
  • 1 Bay leaf
  • A small piece of Cinnamon stick

For the Garnish:

  • Fresh coriander leaves, chopped
  • A slice of butter or fresh cream (optional)

Cooking Steps:

  1. Drain the overnight-soaked kidney beans.
  2. Heat ghee or oil in the Ultra Pressure Cooker. Add cumin seeds and let them splutter. Add the other whole spices (cloves, bay leaf, cinnamon stick) and sauté for a few seconds.
  3. Add the finely chopped onions and sauté until they turn golden brown. Add ginger-garlic paste and cook for one minute.
  4. Add the tomato purée and cook until the oil starts to separate from the gravy.
  5. Add all the powdered spices (turmeric, garam masala, coriander, red chili) and salt. Mix well and cook for a minute.
  6. Add the drained kidney beans and stir to coat them in the masala.
  7. Pour in the water, mix well, and close the cooker lid with the weight. Cook for 5-6 whistles on medium heat. The Ultra Pressure Cooker ensures the beans are tenderized perfectly, all in a single pot.
  8. Let the pressure release naturally. Open the lid and check if the beans are soft. Mash a few beans with a ladle to thicken the gravy.
  9. Garnish with fresh coriander leaves and serve hot with steamed rice and a dollop of butter.

Ingredients:

For the Chicken Biryani:

  • 500g Chicken, cut into medium pieces
  • 1.5 cups Basmati rice, rinsed and soaked for 30 minutes
  • 2 large Onions, thinly sliced
  • 2 Tomatoes, chopped
  • 1/2 cup Curd
  • 1 teaspoon Garam masala
  • 1 tablespoon Ginger-garlic paste
  • 1 teaspoon Turmeric powder
  • 1 teaspoon Red chili powder
  • 2 tablespoons Ghee or oil
  • 3 cups Water
  • Salt to taste

For the Whole Spices:

  • 2-3 Green cardamoms
  • 2 Cloves
  • 2 Cloves
  • 1 Bay leaf
  • 1 small piece Cinnamon stick
  • 1 teaspoon Cumin seeds

For the Garnish:

  • A handful of fresh mint leaves
  • A handful of fresh coriander leaves, chopped
  • Fried onions (optional)

 Chicken Biryani

A flavorful feast that combines tender, marinated chicken with layers of aromatic spiced rice. This one-pot method ensures a rich, authentic taste without the hassle.

Cooking Steps:

  1. Marinate the chicken pieces with curd, ginger-garlic paste, turmeric powder, red chili powder, biryani masala, and salt. Let it rest for at least 30 minutes.
  2. Heat ghee or oil in the Ultra Pressure Cooker. Add the whole spices and sauté until fragrant.
  3. Add the thinly sliced onions and sauté until they turn golden brown.
  4. Add the chopped tomatoes and cook until they are soft and the oil separates.
  5. Add the marinated chicken and cook on high heat for 5-7 minutes until the chicken is seared.
  6. Drain the soaked rice. In a separate bowl, mix the rice with 1 teaspoon of biryani masala, a pinch of salt, and a few mint leaves.
  7. Carefully layer the spiced rice over the chicken in the cooker. Do not stir.
  8. Pour in the water and a few drops of food color (optional). Gently place a few mint and coriander leaves on top.
  9. Close the cooker lid and place the weight. Cook on medium heat for 2 whistles. The Ultra Pressure Cooker’s design allows for perfect layering and steaming without burning the bottom.
  10. Turn off the heat and let the pressure release naturally.
  11. Once done, open the lid, fluff the biryani gently with a fork, and garnish with fried onions and fresh coriander.

From biryani to khichdi, make every Sunday special – Cook it all in one pot with Ultra.

Khichdi

The ultimate simple, nourishing, and comforting meal, perfect for a lazy Sunday or a light dinner. It’s a wholesome blend of lentils and rice that is both delicious and easy on the stomach.

Ingredients:

For the Khichdi:

  • 1 cup Rice
  • 1/2 cup Moong dal (split yellow lentils)
  • 1 large Onion, chopped
  • 1 Tomato, chopped
  • 1/2 cup mixed vegetables (peas, carrots)
  • 1 teaspoon Turmeric powder
  • 1 teaspoon Garam masala
  • 1 tablespoon Ghee
  • 4 cups Water
  • Salt to taste

For the Tempering:

  • 1 teaspoon Cumin seeds
  • 1 teaspoon Mustard seeds
  • A pinch of Asafoetida (hing)
  • 2-3 Green chilies, slit lengthwise
  • 1 sprig Curry leaves

Cooking Steps:

  1. Wash the rice and moong dal together thoroughly.
  2. Heat ghee in the Ultra Pressure Cooker. Add mustard seeds and let them splutter. Add cumin seeds, asafoetida, green chilies, and curry leaves. Sauté for a few seconds.
  3. Add the chopped onions and cook until translucent. Add the chopped tomatoes and sauté until soft.
  4. Add the turmeric powder and garam masala. Mix well.
  5. Add the washed rice and dal mixture, along with the mixed vegetables. Stir for 2 minutes to toast the grains.
  6. Pour in the water and add salt. Mix everything thoroughly.
  7. Close the cooker lid and place the weight. Cook on medium heat for 2-3 whistles. The Ultra Pressure Cooker ensures the moong dal and rice cook uniformly in minutes, preserving their taste and nutrients.
  8. Let the pressure release naturally. Open the lid, mix the khichdi gently, and serve hot with a dollop of ghee and a side of pickle or curd.

Cook Smart Without Compromising Taste

Traditional cooking doesn’t have to be complicated. With Ultra Pressure Cookers, you can enjoy the same nostalgic dishes with modern convenience. Whether you’re a busy parent, a student, or simply someone who loves food — Ultra makes Sunday meals cooker-style enjoyable, not exhausting.

Transform your Sunday cooking routine – Explore Ultra Pressure Cookers now!

Mixer Grinder Hacks for Busy Mornings

Effortless Indian Breakfasts Using Mixer Grinder Quick Recipes

Breakfast in Indian homes is a delicious ritual but busy mornings can make even the simplest meals feel like a rush. The good news: with the right mixer grinder quick recipes and smart kitchen hacks, you can whip up wholesome meals in minutes. That’s where the Elgi Ultra mixer grinder comes in designed for speed, efficiency, and consistency, it’s your perfect partner for everyday breakfast prep. Ideal for students, working parents, and everyone in between, these techniques help you conquer the morning hustle while keeping flavors vibrant and nutrition intact.

Why Mixer Grinder Quick Recipes Are a Game-Changer

  • Time-save: Batch-process basic ingredients like chutneys, batters, spice mixes
  • One-appliance prep: Grinding, blending, and mixing no extra tools
  • Less cleanup: Just one jar to wash
  • Uniform texture: Consistency ensures even cooking and flavor
  • Nutrient retention: Quick blends preserve freshness compared to prolonged cooking

Pair these benefits with a reliable appliance like the ELGi Ultra Mixer Grinder and your morning routine becomes smooth, efficient, and stress-free.

Morning Hacks That Work Every Day

1. Overnight Oat Smoothie Jar

Prep night before:

  • Blend oats, yogurt (or almond milk), honey, and chia seeds
  • Stir in fruit chunks

Refrigerate overnight
In the morning:
Blend again for 10–15 sec, pack smoothie ready-to-drink!

2. Masala Chai Paste

  • Monthly prep in grinder:
    Blend ginger, green chilies, mint, and water into paste
    Freeze into ice cube trays
  • In the morning:
    Dissolve a cube in boiling milk + tea leaves for instant chai zest

3. Pancake or Dosa Batter

  • Weekend batch:
    Grind oats + banana for pancakes; rice + urad dal for dosa
    Store batter in refrigerator

 In the morning:
Just pour on the hot tawa-ready in 2 minutes.

4. Vegetable & Lentil Parathas

  • Evening prep:
    Grate veggies and combine with soaked dal bits in grinder to coarse mix

In the morning:
Stuff and roll for nutritious multi-veg parathas

5. Nut Butter Bliss

  • Once-in-a-week treat: grind almonds/kaju/peanuts
    Store homemade nut butter

 Daily hack:
Swirl a spoon into oats, smoothies, or spread on toast -nutritious and filling

6. Chutney Jars for the Week
Make fresh chutneys: coriander, coconut, mint-ginger
Store small jars

 In the morning:
Scoop, warm slightly, pair with idli, dosa, or poha

7. Quick Veggie Egg Omelet Mix

  • Blend onion, capsicum, tomato, and herbs into puree
  • Next morning: Just whisk with eggs + a bit of flour, cook omelet in a minute

8. Instant Upma Mix

  • Grind roasted poha or rava with spices like mustard seeds and chilies
    Store
  •  Morning: Sauté with veggies, mix upma mix + water-serve in 5 minutes

In the morning:
Stuff and roll for nutritious multi-veg parathas

9. Spicy Dhania Jeera Powder

  • Grind roasted cumin, coriander, and handle
  • Store in jar
  • Add a pinch to curd, oats, poha or soups-savory breakfast boost!

10. Breakfast Laddoo Mix

  • Blend oats, dates, nuts, seeds together
  •  Shape into laddoos

 Morning munchable-energy on the go

Recipe Walkthroughs for 3 Hacks

A. Overnight Oat Smoothie Jar

  • In grinder jar: ½ cup oats + ¾ cup yogurt + 1 tsp honey + 1 tsp chia seeds
  • Blend until creamy, stir in chopped apple/banana/berries
  • Refrigerate overnight
  • Next morning: blend for 10 seconds, serve chilled

B. Masala Chai Cube

  • Into grinder: 1” ginger, 2 green chilies, 10 mint leaves, 2 tbsp water
  • Blend to paste, spoon into ice trays, freeze

Use one cube per cup of milk + tea leaves

C. Nut Butter

  • Roast 500 g almonds in oven/tilt over stove until skin cracks
  • In Ultra grinder, blend until it crumbles → runs → becomes smooth (approx. 8–10 mins)
  • Add salt, optional honey/cinnamon in final minute
  • Store in sealed jar perfect on toast, porridge, or rolls

Why ELGi Ultra Mixer Grinder Fits These Hacks

  • Power & consistence: 750–1000 W motor handles tough ingredients
  • Leak-proof jars & stainless steel blades ensure no mess
  • Minimal noise and overheat protection safe for everyday use
  • Compact design fits small Indian kitchens with ease

Easy cleanup with detachable parts and shiny finish

Bite-Sized Quick Breakfast Recipes

Recipe Ingredients Prep Time Notes
Spinach-Paneer Smoothie Spinach, paneer, honey, milk 2 min Blend fresh
Methi Paratha Mix Methi, chapati flour, salt, spices 5 min Stuff + cook parathas
Instant Choco-Oat Shake Oats, cocoa, milk, banana 1 min Blend quick chill
Masala Egg-Poha Poha, eggs, spices, onions 3 min Blend onion, toss egg

Troubleshooting & Tips

  • Jams in grinder? Pulse and scrape sides
  • Lumpy batters? Add a tbsp water, blend longer
  • Overheating? Pause 1 min Ultra’s protection handles it
  • Storage tip: use lids, refrigerate batters within 2 hours

Final Thoughts

Busy mornings don’t have to sacrifice nutrition or flavor. By using smart mixer grinder quick recipes and implementing these time-saving hacks, you can serve satisfying Indian breakfasts without the chaos. With a dependable appliance like the ELGi Ultra Mixer Grinder at your side, breakfast prep becomes as easy as push-blend-pack every single time.

Elgi Ultra Mixer Grinders

The Ultra range of mixer grinders are designed to provide healthy and nutritious food at the right texture and consistency

FITTED WITH METAL COUPLERS

Lasts a lifetime compared to ordinary rubber couplers

AISI 304 FOOD-GRADE STAINLESS STEEL

Rust-resistant food-grade stainless steel jars

STAINLESS STEEL METAL BODY

Sturdy, reliable and long lasting

SLOW JUICING FUNCTION

For thick, nutritious juice without crushed seeds

CHOPPER / KNEADER ATTACHMENTS

Tasks like chopping vegetables and kneading dough are made easier using extra smart attachments

ELECTRONIC SPEED SENSOR

Automatically corrects speed fluctuations and maintains the specified grinding speed to get the right texture & taste

Mixer Grinder Recipes for Immunity Boosting Drinks

In today’s fast-paced world, immunity has become more than just a buzzword  it’s a daily essential. From fighting fatigue to fending off infections, a healthy immune system is your body’s best defense. The good news? You don’t need expensive supplements to boost your immunity. Just head to your kitchen and blend your way to better health with the help of a mixer grinder.

Using the Ultra Mixer Grinder, you can prepare fresh, nutrient-packed immunity drinks mixer recipes at home  faster, smoother, and more efficiently  without compromising on taste or nutritional value.

Why Homemade Immunity Drinks Work Better

Homemade immunity boosters are:

  • Free from preservatives and artificial sugars
  • Made from whole, seasonal ingredients
  • Customizable to your health needs
  • More cost-effective than packaged options

And when you use a high-performance appliance like the Ultra regular range Mixer Grinder, these drinks retain all their natural goodness  thanks to its precision blending, low heat buildup, and nutrient-preserving design.

Top 5 Immunity Drinks Mixer Grinder Recipes You Can Make at Home

Elevate your daily wellness routine with these delicious and powerful immunity-boosting drinks. Each recipe is designed to be quick and simple, utilizing the efficiency and precision of your Ultra Mixer Grinder to create a perfect, health-packed blend every time.

1. Amla-Ginger Shot (Vitamin C Powerhouse)

This zesty shot is a fantastic way to kickstart your day, packed with a concentrated dose of Vitamin C and metabolism-boosting ginger.

Ingredients:

  • 3-4 fresh Amla (Indian gooseberries), de-seeded and chopped
  • 1-inch piece of fresh ginger, peeled and roughly chopped
  • 1/2 teaspoon of freshly ground black pepper
  • 1 tablespoon of honey (or to taste)
  • 1/2 cup of water

Recipe Steps:

  1. Place the chopped amla, ginger, black pepper, and half a cup of water into the Ultra regular range Mixer Grinder’s chutney jar.
  2. Blend on a high setting for 30-45 seconds until you have a smooth, well-blended paste. The powerful action of the chutney jar ensures a pulp-free mixture, perfect for a smooth shot.
  3. Pour the mixture through a fine-mesh sieve or muslin cloth into a small glass. Press down with a spoon to extract all the liquid.
  4. Stir in the honey until it is fully dissolved.
  5. Serve immediately as a daily morning shot for a potent vitamin boost.

2.Carrot-Turmeric Smoothie (Antioxidant-Rich)

This vibrant smoothie is a treat for your taste buds and your body, offering powerful antioxidants to support skin health and reduce inflammation.

Ingredients:

  • 1 large carrot, peeled and chopped
  • 1/2-inch piece of fresh turmeric, peeled and chopped
  • 1 cup of fresh orange juice
  • Juice of half a lemon
  • 1 tablespoon of flaxseed (or chia seeds)

Recipe Steps:

  1. Add the chopped carrot, fresh turmeric, flaxseed, orange juice, and lemon juice into your Ultra Mixer Grinder’s main jar.
  2. Start blending on a medium setting for 15 seconds, then switch to high. The Ultra’s precision-engineered stainless-steel blades are designed to effortlessly handle fibrous roots like carrot and turmeric.
  3. Continue blending for about 45 seconds to a minute until the smoothie has a perfectly silky texture with no fibrous bits remaining.
  4. Pour into a tall glass and enjoy this nutrient-dense drink as a mid-day snack or a breakfast smoothie.

3. Tulsi-Kadha Blender Tonic (Ayurvedic Classic)

A warm and soothing concoction that has been a go-to remedy for generations, this tonic is perfect for boosting immunity and soothing the throat.

Ingredients:

  • 1/2 cup fresh tulsi (holy basil) leaves
  • 1-inch piece of cinnamon stick
  • 1/2-inch piece of fresh ginger, peeled
  • 4-5 black peppercorns
  • 1/2 teaspoon of jaggery (or honey to taste)
  • 2 cups of water

Recipe Steps:

  1. Begin by pre-blending your whole spices. Place the cinnamon stick, ginger, and black peppercorns into the Ultra dry jar. Grind on a high setting for 20-30 seconds to get a coarse powder. This step is crucial for faster flavor extraction.
  2. In a saucepan, bring 2 cups of water to a boil. Add the fresh tulsi leaves and the freshly blended spice mix.
  3. Reduce the heat to a simmer and let the mixture steep for 5-7 minutes, allowing the flavours to fully infuse.
  4. Strain the kadha into a mug, discarding the solids. Add jaggery or honey to sweeten and stir until dissolved.
  5. Serve warm as a comforting and powerful tonic.

4. Watermelon-Mint Cooler with Black Salt (Hydrating + Alkalizing)

This refreshing cooler is the ultimate way to stay hydrated and detoxify your system, perfect for a hot afternoon or after a workout.

Ingredients:

  • 2 cups of fresh watermelon cubes, de-seeded
  • 8-10 fresh mint leaves
  • Juice of half a lemon
  • 1/2 teaspoon of black salt (kala namak)
  • A few ice cubes (optional)

Recipe Steps:

  1. Place the watermelon cubes, mint leaves, lemon juice, and black salt into the Ultra Mixer Grinder’s juicing jar.
  2. Use the dedicated juicing function or blend on a high setting for just 10-15 seconds. The Ultra Mixer Grinder’s design quickly blends the ingredients without generating excessive foam, keeping the drink’s texture and flavour intact.
  3. Pour the cooler into a glass, add a few ice cubes if desired, and garnish with a mint sprig.
  4. This drink is a fantastic way to naturally replenish electrolytes and is delicious served immediately.

5. Green Immunity Smoothie (Everyday Detox)

A complete meal in a glass, this smoothie is a powerhouse of iron, antioxidants, and fiber, providing sustained energy and a gentle detox.

Ingredients:

  • 1 cup of fresh spinach leaves
  • 1 green apple, cored and chopped
  • 1/2 ripe banana
  • 1/4 cucumber, peeled and chopped
  • Juice of half a lemon
  • 1 cup of water or coconut water

Recipe Steps:

  1. Add all the ingredients spinach, green apple, banana, cucumber, lemon juice, and water to the Ultra Mixer Grinder’s main jar.
  2. Start blending on a low setting to begin breaking down the ingredients, then switch to a high setting. The Ultra’s high-torque motor ensures even and consistent blending of all the fibrous greens and fruits.
  3. Blend for about 60 seconds until the smoothie is completely smooth and free of any leafy bits. This preserves the fiber and taste, giving you a perfectly creamy texture.
  4. Serve chilled and enjoy this nutrient-packed drink as a breakfast replacement or a revitalizing snack

Why Use Ultra Mixer Grinder for Immunity Drinks?

  • Powerful, Consistent Blending – Breaks down even tough roots like ginger and turmeric
  • Nutrient Retention – Low heat motor prevents nutrient loss
  • Smooth, Pulp-Free Texture – For easier digestion and better taste
  • Multiple Jar Sizes – For both small shots and large smoothies
  • Quick Clean-Up – Spend less time scrubbing and more time sipping

Pro Tip:

Prepare your spice mixes (turmeric, pepper, cumin) using the Ultra dry grinding jar and store them in airtight containers ready for your daily immunity drinks.

Stay Healthy , Stay Natural

Wellness starts in your kitchen. With the right ingredients and the right tools, you can create a habit of health that fits your lifestyle. These immunity drinks mixer recipes are not just quick fixes they’re long-term investments in your immunity.

Elgi Ultra Mixer Grinders

The Ultra range of mixer grinders are designed to provide healthy and nutritious food at the right texture and consistency

FITTED WITH METAL COUPLERS

Lasts a lifetime compared to ordinary rubber couplers

AISI 304 FOOD-GRADE STAINLESS STEEL

Rust-resistant food-grade stainless steel jars

STAINLESS STEEL METAL BODY

Sturdy, reliable and long lasting

SLOW JUICING FUNCTION

For thick, nutritious juice without crushed seeds

CHOPPER / KNEADER ATTACHMENTS

Tasks like chopping vegetables and kneading dough are made easier using extra smart attachments

ELECTRONIC SPEED SENSOR

Automatically corrects speed fluctuations and maintains the specified grinding speed to get the right texture & taste

One Pot Wonders - Save your time with these pressure cooker recipes

Pressure cookers are a lifesaver, when you run out of time. They bring out the deep rich flavours while saving time and effort. From working moms to busy students who love home-cooked food meals, one pot pressure cooker recipes are very comforting. And you can also escape the hassle of washing a pile of dirty dishes with one pot pressure cooker recipes. Let’s dive into five such one-pot recipes and make cooking simpler, faster and tastier together!

1.Pressure Cooker Rasam Rice

Ingredients

For Rasam Powder (or use ready-made 1 ½ tbsp rasam powder):

  1. Toor dal – 1 tbsp
  2. Coriander seeds – 1½ tbsp
  3. Cumin seeds – 1 tsp
  4. Black pepper – 1 tsp
  5. Dry red chilies – 2
  6. Asafoetida (hing) – a pinch

Dry roast the ingredients one by one and grind to a powder. You can skip this if using 1½ tbsp rasam powder.

For Rasam Base

  1. Tamarind – 1 small lemon-sized
  2. Tomato – 1 large (chopped)
  3. Garlic – 4 cloves (crushed)
  4. Green chili – 1 (slit)
  5. Rice – ¾ cup (regular white rice)
  6. Toor dal – ¼ cup
  7. Turmeric powder – ½ tsp
  8. Salt – to taste
  9. Curry leaves and Coriander leaves – few

For Tempering

  1. Ghee – 1 tbsp
  2. Mustard seeds – ½ tsp
  3. Cumin seeds – ½ tsp
  4. Dry red chili – 1
  5. Curry leaves – a few
  6. Asafoetida – a pinch

Cooking directions

  • Soak tamarind in ½ cup warm water for 10 minutes. Squeeze and extract the juice.
  • Wash rice and toor dal together. Soak for 10–15 minutes while you prep the rest.
  • In a pressure cooker, add 1 tsp ghee or oil and saute chopped tomatoes, garlic, green chili, curry leaves, turmeric and a little salt.
  • Add the tamarind extract and let it simmer for 2–3 minutes.
  • Drain soaked rice and dal and add to the cooker. Add 3½ to 4 cups of water.
  • Add rasam powder and adjust salt.
  • Close the lid and pressure cook on medium heat for 3–4 whistles.
  • For tempering, in a small pan, heat ghee, add mustard seeds. Let them splutter.
  • Add cumin seeds, red chili, curry leaves, and a pinch of asafoetida and pour this over the cooked rasam rice.
  • Garnish with fresh coriander leaves and serve hot.

2.One Pot Paneer Pulao

Cooking directions

  • Lightly pan-fry paneer cubes in 1 tsp ghee until golden on the edges and keep them aside.
  • Heat oil and ghee in a pressure cooker. Add whole spices and sliced onions; saute until golden brown.
  • Add green chilies and ginger-garlic paste. Cook till raw smell goes away.
  • Add chopped tomatoes and cook till soft and mushy. Then add turmeric, red chili powder, coriander powder, and salt.
  • Add green peas and the soaked and drained rice.
  • Add paneer cubes and mint leaves. Pour 1½ cups of water, stir and adjust salt.
  • Close the lid and pressure cook on medium heat for 1 whistle.
  • After the pressure releases naturally, One Pot Paneer pulao is ready to be served.

Ingredients

Main Ingredients

  1. Basmati rice – 1 cup (soaked for 15–20 minutes)
  2. Paneer – 150–200 g (cubed)
  3. Onion – 1 large (thinly sliced)
  4. Tomato – 1 medium (chopped)
  5. Green peas – ½ cup (fresh or frozen)
  6. Ginger-garlic paste – 1 tsp
  7. Green chilies – 1–2 (slit)
  8. Mint leaves – a handful
  9. Coriander leaves – for garnish
  10. Salt – to taste
  11. Water – 1½ cups
  12. Ghee or Oil

Whole Spices

  1. Cumin seeds – 1 tsp
  2. Bay leaf – 1
  3. Cloves – 3
  4. Cardamom – 2
  5. Cinnamon stick – 1 small
  6. Star anise – 1 (optional)
  7. Black pepper – 4–5 (optional)

Powdered Spices

  1. Red chili powder – ½ tsp
  2. Turmeric powder – ¼ tsp
  3. Coriander powder – 1 tsp

3.One Pot Masala Khichdi

Ingredients

  1. Rice – ¾ cup
  2. Moong dal (split yellow) – ¼ cup
  3. Onion – 1 (sliced)
  4. Tomato – 1 (chopped)
  5. Carrot – 1 (chopped)
  6. Beans – a handful (chopped)
  7. Green peas – ¼ cup
  8. Potato – 1 small (cubed)
  9. Water – 3.5 to 4 cups (for soft, semi-mushy texture)
  10. Coriander leaves – for garnish
  11. Lemon juice – 1 tsp (optional)

Spices

  1. Turmeric powder – ½ tsp
  2. Red chili powder – ½ tsp (adjust to taste)
  3. Coriander powder – 1 tsp
  4. Garam masala – ½ tsp
  5. Salt – to taste

For Tempering

  1. Ghee – 1 tbsp
  2. Cumin seeds – 1 tsp
  3. Mustard seeds – ½ tsp
  4. Hing (asafoetida) – a pinch
  5. Curry leaves – 1 sprig
  6. Dry red chili – 1 or 2
  7. Ginger – 1 tsp (grated or paste)
  8. Garlic – 1 tsp (minced)

Cooking directions

  • Wash rice and dal together, soak for 10–15 minutes. Chop all vegetables. Keep them aside.
  • Heat ghee and oil in a pressure cooker. Add mustard seeds and cumin seeds. Let them splutter.
  • Add hing, curry leaves, dry red chili, green chilies, ginger, and garlic. Saute for a few seconds.
  • Add onions and saute until soft. Add tomatoes, cook till mushy.
  • Then add turmeric, red chili powder, coriander powder, salt and toss in all chopped vegetables. Mix well.
  • Drain the soaked rice and dal. Add to the cooker and mix everything.
  • Add 3.5 to 4 cups of water depending on the consistency. Add garam masala and adjust salt.
  • Close the lid and cook on medium heat for 3 whistles.
  • After the pressure releases, open the lid, give it a gentle mix. Add lemon juice and garnish with coriander leaves.
  • Serve hot with curd, pickle, or papad.

4.One Pot Vegetable Stew

Cooking directions

  • Wash and cut all vegetables evenly to ensure uniform cooking.
  • Keep coconut paste ready.
  • In a pressure cooker, heat coconut oil, add cinnamon, cloves, cardamom, and bay leaf.
  • Once aromatic, add sliced onions, green chilies, and ginger and saute until onions turn soft and translucent.
  • Add all the chopped vegetables and toss well for 2–3 minutes in the oil and spices.
  • Add curd, salt, crushed black pepper and enough water.
  • Add the coconut paste, adjust salt and mix well.
  • Close the lid and cook the stew for 1 or 2 whistles.
  • Garnish the stew with chopped coriander leaves and serve hot.
  • This vegetable stew goes well with rice, aapam and idiyappam.

Ingredients

Vegetables (use a mix of your choice)

  1. Carrot – 1 (sliced)
  2. Potato – 1 medium (cubed)
  3. Green beans – 10 (chopped)
  4. Green peas – ¼ cup (fresh or frozen)
  5. Cauliflower – ½ cup (small florets)
  6. Onion – 1 large (thinly sliced)
  7. Green chilies – 2 (slit)
  8. Ginger – 1 inch (crushed)
  9. Curry leaves and Coriander leaves

Other Ingredients

  1. Coconut oil – 1.5 tbsp (or any neutral oil)
  2. Black pepper – ½ tsp (coarsely crushed or whole)
  3. Cinnamon stick – 1 small piece
  4. Cloves – 2
  5. Cardamom – 2
  6. Bay leaf – 1
  7. Salt – to taste
  8. Water – 1 cup (adjust as needed)
  9. Curd – ¼ cup
  10. Coconut paste – 1 cup (grind ½ cup shredded coconut with 1 tsp fennel seeds into a paste)

5.One Pot Aloo Tamatar Gravy

Ingredients

  1. Potatoes – 3 (peeled and cubed)
  2. Tomatoes – 3 (finely chopped or blended)
  3. Green chilies – 1–2 (slit)
  4. Ginger – 1 tsp (grated or paste)
  5. Water – 1 to 1½ cups
  6. Fresh coriander

Spices

  1. Turmeric powder – ½ tsp
  2. Red chili powder – ½ tsp (adjust to taste)
  3. Coriander powder – 1 tsp
  4. Garam masala – ½ tsp
  5. Salt – to taste

For Tempering

  1. Oil or ghee – 1½ tbsp
  2. Cumin seeds – 1 tsp
  3. Hing (asafoetida) – a pinch
  4. Kasuri methi – 1 tsp (crushed, optional)

Cooking directions

  • Heat oil/ghee in a pressure cooker on medium heat. Add cumin seeds and let them splutter. Add a pinch of hing.
  • Add green chilies and ginger. Saute for a few seconds.
  • Add chopped or blended tomatoes and saute.
  • Add turmeric, chili powder, coriander powder, and salt.
  • Cook the masala for 5 to 7 minutes until oil begins to separate.
  • Add the cubed potatoes and toss well in the masala. Let it cook for 2–3 minutes.
  • Add about 1 to 1½ cups water and mix in kasuri methi and garam masala.
  • Close the lid and pressure cook on medium heat for 2–3 whistles.
  • After the pressure releases open and mash a few potato pieces to slightly thicken the gravy. Adjust salt, spices or water if needed.
  • Add freshly chopped coriander and serve hot with jeera rice, paratha or puri.

Beyond the Basics – No Rice Protein Rich Dosa Recipes for Power-Packed Mornings

Rice and Urad dhal are the sole ingredients in making the delicious South-Indian crepe dish Dosa. This traditional recipe can be altered in many ways by substituting carbohydrate-rich rice with protein-rich dhal lentils and grains, taking the nutrient values beyond the basics. Let’s dive into few such dosa recipes that are sure to taste amazing as well as are packed with proteins for a wholesome meal.

1.Ragi – Bajra Dosa

Ingredients

  • Ragi – 1 cup
  • Bajra – 1 cup
  • Urad dal – 1 cup
  • Salt
  • Oil or Ghee

Cooking directions

  • Wash and rinse the ragi, bajra and urad dal together.
  • Add enough water and soak it for 4 to 5 hours.
  • After 5 hours, drain the water and add it to a Stealth Elite mixer grinder.
  • Run the mixer and grind the mixture into a smooth paste.
  • Add water little by little while grinding to avoid the batter turning watery.
  • Take the ground batter in a bowl and add salt.
  • Let the batter sit overnight for fermentation.
  • After fermentation, mix the batter well and make dosas with oil or ghee
  • Moderate uniform heat makes perfect brown crispy dosas.

2.Masoor Dal Dosa

Cooking directions

  • Wash the urad dal and masoor dal twice or thrice to clean any impurities.
  • Soak them together overnight or at least for 4 hours.
  • Drain the water from the soaked dal and add it to a Stealth Elite mixer grinder.
  • Add peeled ginger slices, peppercorns and salt to the mixer.
  • Grind to a smooth paste and pour into a large bowl.
  • Now you can prepare dosas instantly.
  • Heat a tawa and add a ladle full of batter in a circle with oil or ghee.
  • Cover, cook and flip till both the sides turns golden brown.
  • This dosa can be prepared instantly or can also be left to ferment overnight.
  • Fermentation increases the nutrient value of the dosa.

Ingredients

  • Masoor dal (the split orange variety) – 1 cup
  • Urad dal – ½ cup
  • Ginger piece – 1 inch
  • Peppercorns – ½ tsp
  • Salt
  • Oil or ghee

3.Moong Sprouts – Oats Dosa

Ingredients
• Whole Moong Gram / Green Gram – 1 cup
• Instant Oats – 1 cup
• Salt
• Oil or Ghee

Cooking directions

  • Wash and soak dried whole green gram or moong for 6 hours.
  • After soaking, drain the water completely and keep covered in a dark place again for 8 hours after which the grams start to sprout.
  • Now add the sprouts along with oats, salt and little water to a Stealth Elite mixer grinder and grind to a smooth batter.
  • This dosa can be made instantly or can be left to ferment.
  • Heat a dosa pan well, pour a ladle of the batter and spread it into a dosa.
  • Add ghee or oil to avoid sticking of the dosa to the pan.
  • Cover and cook till the dosa turns golden brown and crisp.

High in Protein – Moong, Masoor and Urad dal are rich in protein, making this dosa a perfect option for healthy weight gain and as a great energy source.
Rich in Fibre – The dosas are rich in fibre which can help digestion, supports healthy gut bacteria and controls blood sugar levels.
Good source of Iron – Ragi and Moong are a great source of iron, which is essential for healthy red blood cells.
Gluten Free – These dosas are gluten free making it a perfect option for those with gluten intolerance and improve nutrient absorption.
Rich in Minerals – Ragi, Bajra and Oats are rich sources of minerals like calcium magnesium and potassium.

Health Benefits of the No Rice Protein Rich Dosas

Revolution Slider Error: The param Slider Width should not be empty.

Breakfast porridge, snacks and smoothies.

Explore short-eats that make Navratri fasting healthy and fun.

Try these short-eats, snack and breakfast recipes during your Navratri fasting. They are nutritious and a change to your routine breakfast dishes and snacks.

Sweet potato tikki

sweet potato tikki
Image source: Shutterstock images

An interesting change to aloo tikkis, these sweet potato tikkis made with shingaada (water chestnut) flour is a healthy and delicious snack to enjoy while fasting for Navratri.

INGREDIENTS

Makes: 10

Prep Time
20 MINS
Cooking Time
10 MINS
Total Time
30 MINS
[print-me target=”div#sweetpotatotikki ” title=”PRINT RECIPE”]
Prep Time
20 MINS
Cooking Time
10 MINS
Total Time
30 MINS

2 Medium-sized sweet potatoes (boiled, peeled and grated)
2-3 Tbsp shingaada flour
1 Tsp green chillies (chopped)
1 Tbsp coriander leaves (chopped)
1 Tbsp lime juice
1 Tsp cumin powder
½ Tsp chaat masala
1 Tsp fennel seeds (roughly crushed)
1 Tsp coriander seeds (roasted and roughly crushed)
1 Tsp black pepper (roughly crushed)
Salt
Oil (for frying)

Method:

1. In a large bowl combine all the ingredients for the tikki. Add the singhaada flour to bind and use as required.
2. Shape into tikkis and shallow fry. Serve hot.

Amaranth/rajgira flour dosa

Amaranth/rajgira flour dosa
Image source: Shutterstock images

Amaranth is a leafy green that is commonly prepared as a subzi. The grain of the amaranth plant which technically is the fruit of the plant is harvested and milled as a nutritious flour. Amaranth flour is gluten-free and rich in minerals and vitamins. It is considered a superfood which makes this a great choice for a nutritious Navratri fasting dish

INGREDIENTS

Makes: 6

Prep Time
10 MINS
Cooking Time
10 MINS
Total Time
20 MINS
[print-me target=”div#rajgiraflourdosa” title=”PRINT RECIPE”]
Prep Time
10 MINS
Cooking Time
10 MINS
Total Time
20 MINS

1 Cup amaranth/rajgira flour
1/4 Cup raagi flour
1/4 Cup mung flour
1 Tbsp corriander seeds
1 Tsp cumin seeds
2 Red chillies (dry)
Salt
Ghee

Method:

1. Slightly roast coriander seeds and dry chillies and roughly blitz in your Ultra Mixer Grinder
2. Add this to all the ingredients and mix well with water to form a batter. The consistency is similar to dosa batter.
3. Add ghee to the dosa and cook. Serve hot and crispy.
Tip: You can substitute raagi and mung flour with ½ cup soaked and ground barnyard millet flour as well.

Apple almond smoothie

Apple almond smoothie
Image source: Shutterstock images

Fruits are a big part of the traditional fasting practices. Some families fast with just fruits for nine days. They are rich in fibre, easy to process and help purify the blood while loading the body with antioxidants, vitamins and minerals.

INGREDIENTS

Makes: 2

Prep Time
10 MINS
Total Time
10 MINS
[print-me target=”div#applealmondsmoothie” title=”PRINT RECIPE”]
Prep Time
10 MINS
Total Time
10 MINS

2 Cups almond milk
1 Apple (peeled and cubed)
1 Tbsp Honey
1 Tsp chia seeds
1 Tbsp chopped almonds

Method:

1. In your Ultra Mixer grinder, blend all the ingredients together to a smoothie and serve chilled with ice.

Barnyard millet porridge

Barnyard-millet-porridge
Image source: Shutterstock images

Quite similar to rice pudding, this porridge is delectable and a filling breakfast dish. The porridge can be made savoury with yoghurt and tempered with chillies and cumin or sweet with whole milk / almond milk and sweetened with jaggery.

INGREDIENTS

Serves: 1 cup

Prep Time
5 MINS
Cooking Time
20 MINS
Total Time
25 MINS
[print-me target=”div#barnyardmilletporridge” title=”PRINT RECIPE”]
Prep Time
5 MINS
Cooking Time
20 MINS
Total Time
25 MINS

1 Cup banyard millet
1 ½ Cups milk
Jaggery
Chopped nuts and dry fruits

Method:

1. Wash and soak the banyard millet in milk for 30 minutes and cook till done.
2. Add jaggery and top with nuts.
3. Enjoy warm.

Sweet kesar lassi

Sweet kesar lassi
Image source: Shutterstock images

This is one of the simplest and refreshing drinks that is healthy on your gut, completely filling and delicious.

INGREDIENTS

Makes: 2 Tall glasses

Prep Time
10 MINS
Total Time
10 MINS
[print-me target=”div#sweetkesarlassi” title=”PRINT RECIPE”]
Prep Time
10 MINS
Total Time
10 MINS

3 Cups hung curd
1 Cup whole milk
½ Tsp saffron
¼ Tsp chopped pistachios
Sugar (to taste)

Method:

1. Warm ¼ cup of milk and infuse the saffron strands
2. In your Ultra Mixer grinder, combine the reserved milk, saffron milk, hung yoghurt, sugar and blend to a smooth lump-free drink.
3. Top with pistachios and serve chilled.

Elgi Ultra Mixer Grinders

The Ultra range of mixer grinders are designed to provide healthy and nutritious food at the right texture and consistency

FITTED WITH METAL COUPLERS

Lasts a lifetime compared to ordinary rubber couplers

AISI 304 FOOD-GRADE STAINLESS STEEL

Rust-resistant food-grade stainless steel jars

STAINLESS STEEL METAL BODY

Sturdy, reliable and long lasting

SLOW JUICING FUNCTION

For thick, nutritious juice without crushed seeds

CHOPPER / KNEADER ATTACHMENTS

Tasks like chopping vegetables and kneading dough are made easier using extra smart attachments

ELECTRONIC SPEED SENSOR

Automatically corrects speed fluctuations and maintains the specified grinding speed to get the right texture & taste